Users
The Users page displays all user information and allows you to create, edit, or suspend users. You can also assign users to a door or resend activation emails to get a user started.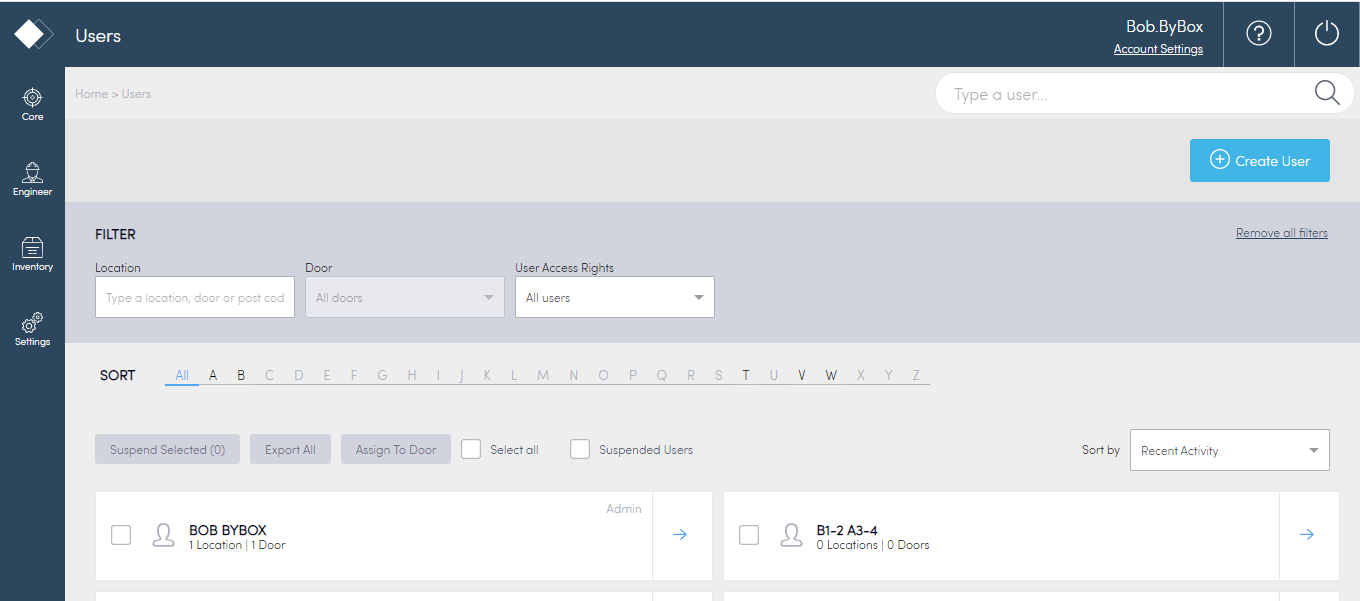
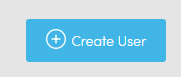
Create a user
You need to create user accounts for anyone using Konnect HQ or Konnect App.
Create an Engineer User
To create a user:
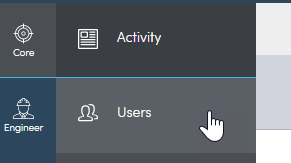
- Select Core > Users.

- Select Create User.
Enter details into the fields.
Note: You can clear the fields if you make an error by selecting the Clear button. All required fields include a red asterisk, "*"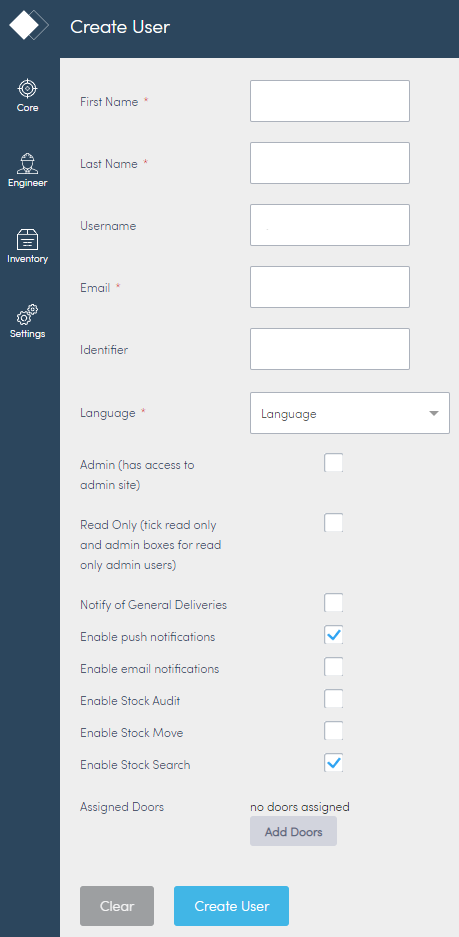
- A message User added appears in green at the top of the screen. You can now see the user on the main Users page.
Create a Carrier User
To create a user:
- Select Core > Users.

- Select Create User.
Enter details into the fields.
Note: You can clear the fields if you make an error by selecting the Clear button. All required fields include a red asterisk, "*"
- A message User added appears in green at the top of the screen. You can now see the user on the main Users page.
Create an Admin User
To create an Admin user:
- Select Core > Users.
- Select Create User.
Enter details into the fields
Select the checkbox for Admin and Enable email notifications

You can clear the fields if you make an error by selecting the Clear button. All required fields include a red asterisk, "*"
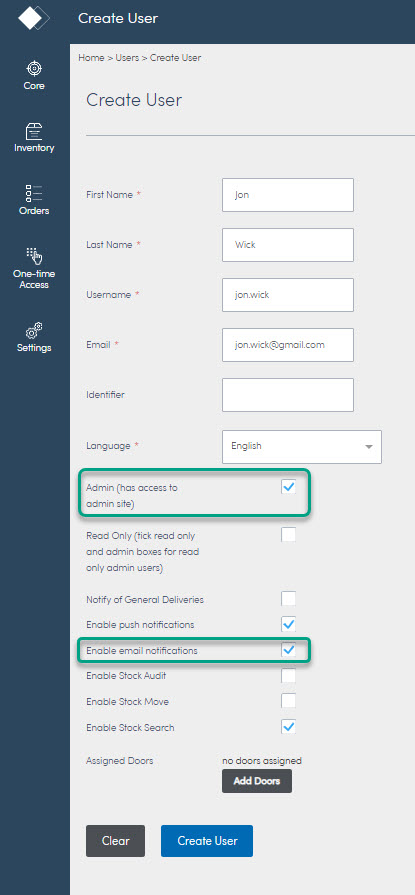
- A message User added appears in green at the top of the screen. You can now see the user on the main Users page.
Field name | Description |
First Name | Enter the user's first name. |
Last Name | Enter the user's last name. |
Username | A username is autogenerated. Edit the field if you want a different username. |
Enter the user's email. | |
Identifier | (Optional) Enter an identifier for this account. |
Language | Enter the user's language. |
Admin | Select if you want the user to have access to everything on Konnect HQ. |
Read Only | Select if you want the user to have read-only access to Konnect HQ. |
| Assigned Doors | Assign doors to the user.
|
Engineer users only | |
| Notify of General Deliveries | Select to notify the user of General Deliveries. |
| Enable push notifications | Select to send push notifications to the user. |
Enable email notifications | Select to send email notification to the user. |
| Enable Stock Audit | Switches on the Stock Audit feature for the user when ticked. |
| Enable Stock Move | Switches on the Stock Move feature for the user when ticked. |
| Enable Stock Search | Switches on the Stock Search feature for the user when ticked. |
| Carrier users only | |
| Enable Smart Scan | Switches on the Smart Scan feature for the user when ticked. |
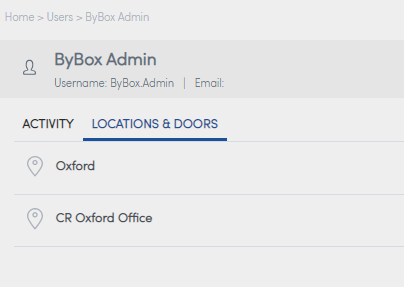
View user details
You can view user details from the Users page.
To view user details:
- Select Core > Users.
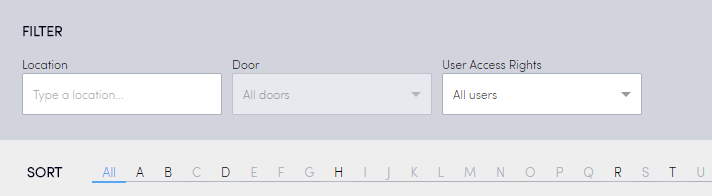
- Scroll to view the full list of users or use the Filter to view users specific to Locations, Doors or Access Rights.

You can also view User details from the user profile page.
- From the user list on the Users main page, select the arrow beside the user you want to view.
- Select the Activity page to view details about the user's activities.
Note: No activity will display for new users.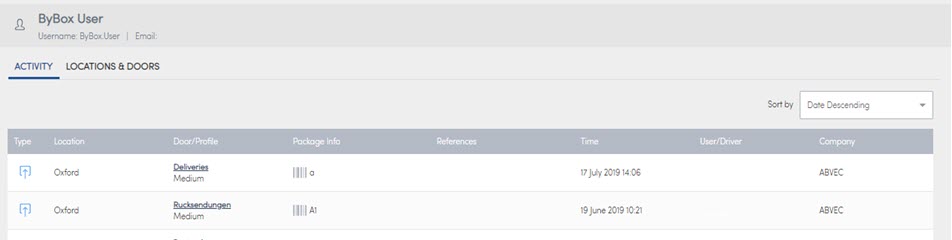
- Select the Locations & Doors page to view details about a user's locations and door assignment.
Update user details
You can update any user profile information in the Users, either from the individual user profile page or the main Users page. This section helps you to update general details about a user, including username, password, email contact and user access.
Some user updates can occur directly from the Users page. See Assign a User to a Door.
To update a user profile:
- Select Core > Users.

- Find the user you want to update.
- Sort by letter or filter to find the user.
- Select the arrow beside the user's name.

- This takes you to the user profile page.
- Select Edit.
- Make any changes to the fields.
Note: You must make sure you let users know if you update any fields, such as username. - Click Update.

The confirmation message Updating successful appears at the top of the screen.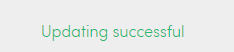
Assign a user to a door
You can assign a user to a door either from the main Users page or the user profile page. You can also assign a user directly from the Location door as well. See Locations for more details.
To assign a door from the main Users page:
- Select Core > Users.
- Find the user you want to update.
- Sort by letter or filter to find the user.

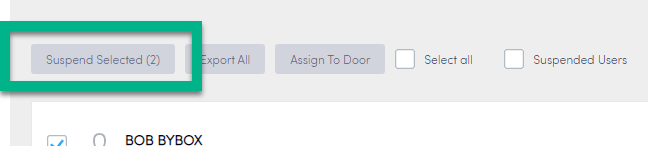
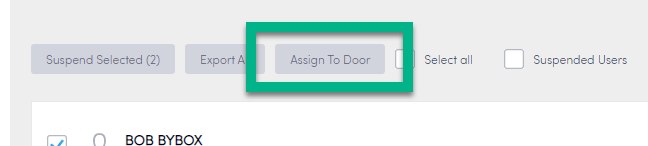
- Select the box beside the user's name.
- Select Assign to Door.

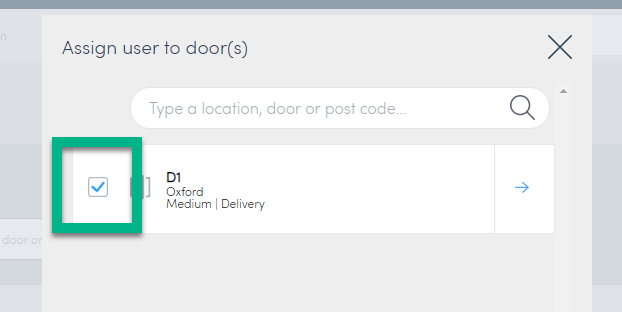
- Select the door(s) you want to assign.
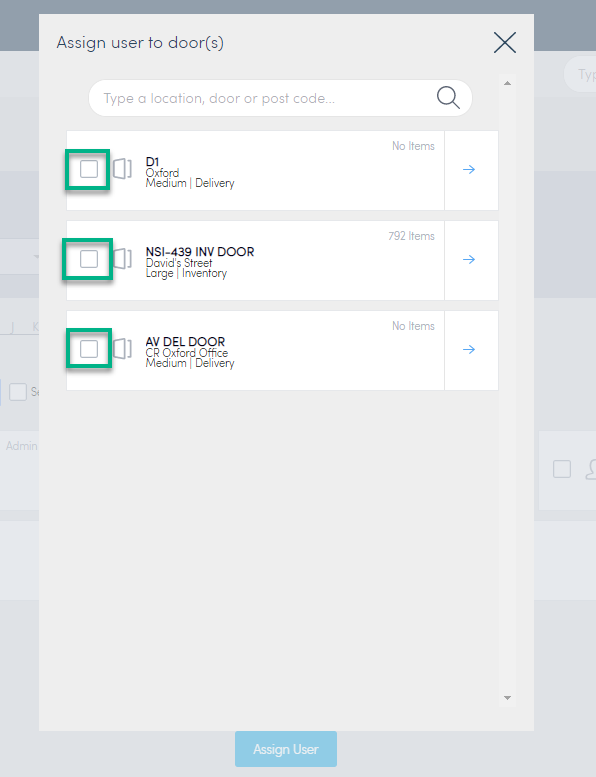
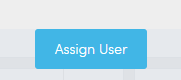
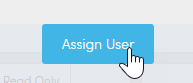
- Select Assign User.
The User is now assigned to the door(s) you requested.
To assign a door from the user profile page:
- Select Core > Users.
- Find the user you want to update.
- Sort by letter or filter to find the user.
- Select the arrow beside the user's name.
- This takes you to the user profile page.

- Select Assign To Door.

- Select the door or doors you want to assign.
- Select Assign User.
The User is now assigned to the door or doors you requested.
Export a list of users
You can export a list of users from Konnect HQ into a .cvs file.
To export a list:
- Select Core > Users.
- Find the users you want to export.
- Sort by letter or filter to find the users.

- Select Export All.

An exported document downloads. This document is a .cvs file.
Resend activation email
There may be several reasons a user needs the activation email sent to them again. You can resend an activation email to a user so they can get set up with Konnect App or Konnect HQ. This is done on the user profile page.
To resend the activation email:
- Select Core > Users.
- Find the user who needs the activation email.
- Sort by letter or filter to find the user.

- Sort by letter or filter to find the user.

- This takes you to the user profile page.

- Select Resend Activation Email.

A green confirmation appears along the top once the email is resent.
Suspend users
To suspend users:
- Select Core > Users.
- Select the users you want to update.
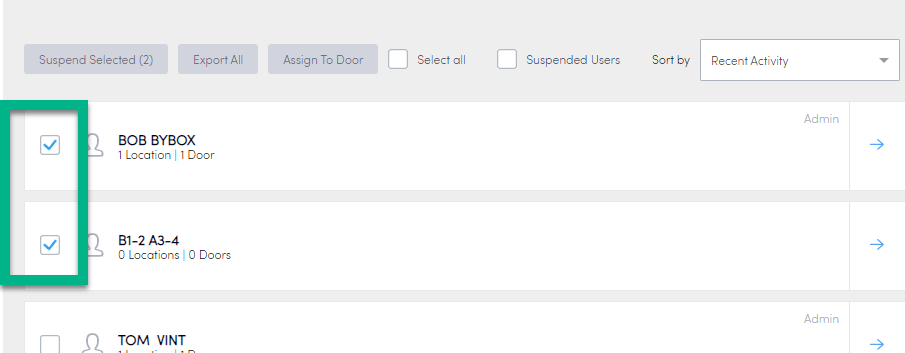
Note: You can also Select All. - Select Suspend Selected.
Your selected users are now suspended. When you refresh the screen, these users now appear as Suspended. You can view these users by selecting Suspended Users. You only see Suspended Users if you select this box.
Note: You cannot bulk unsuspend users.
Assign users to doors
To assign users to doors:
- Select Core > Users.

- Select the users you want to update.
Note: You can also Select All. - Select Assign to Door.
Note: If a user is already assigned to a door, it is not available in the list. Make sure you only select the users that are not already assigned to the door. - Select the box beside the door you want to assign.
- Select Assign User.
Your selected users are now assigned to the door. You can see the door listed beside each user you selected.