Sub-clients
Sub-client allows clients to create clients of their own. Contact your ByBox representative to have this enabled for your account.
Viewing sub-client information by impersonation
You can manage sub-client-specific information by impersonating the sub-client in Konnect HQ. This allows you to make changes and updates, such as add or edit users or doors, to specific sub-clients.
To view a sub-client by impersonation:
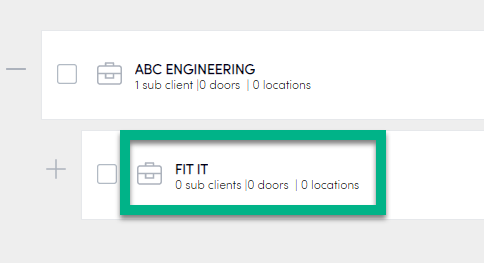
- Select Core > Clients.

- Find the Client you want to view. Example: ABC ENGINEERING.
Note: When searching for Sub-clients, you can navigate back and forth from your browser or use the breadcrumb trail at the top of the page. - Find the sub-client you want to view. Example: FIT IT.
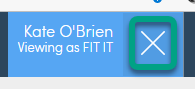
- Select View as Fit IT.

- The Dashboard screen appears and you are now viewing as the sub-client.
You are now in impersonation mode. Impersonation allows you to view and manage sub-client data and perform tasks on your sub-clients behalf.
The following lists details about the tasks you can perform:
To leave impersonation mode, close out the blue button along the top bar to return to your main account.
Creating a sub-client
You can create sub-clients for your clients in Konnect HQ. Make sure Grouping Hierarchy is enabled in Konnect HQ before trying this procedure.
You can create multiple layers of sub-clients in Konnect HQ.
To create a sub-client:
- Select Core > Clients.
- Find the Client you want to add sub-clients.
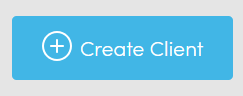
- To create a sub-client directly under the parent client or a Level 1 sub-client, select Create Client.
- Enter the sub-client name in Client Name.

- Enter a sub-client identifier.
- Select Create Client.
- To create a sub-client under an existing sub-client, find the sub-client from the hierarchy and select Create sub-client.

- A confirmation message appears to let you know you have added a client.
Assigning a door to a sub-client
sub-clients can access the doors the same way a client accesses a door. You need to assign each sub-client to doors you want them to open.
You can assign the door when you first create the user. See Create a User in Users.
Before you start: Make sure your primary client is assigned to all the doors you want to assign your sub-clients to.
To assign a door to a sub-client:
- Select profile details of the sub-client.

- Select Assign to Door.
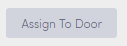
- Select the doors to assign.
Note: Only door available are listed. If you have Inventory doors, you must have Inventory enabled in Konnect HQ for those doors to appear.
- Select Assign Client.

The door is now assigned to the sub-client. You can now see the doors on the sub-client LOCATIONS & DOORS tab.
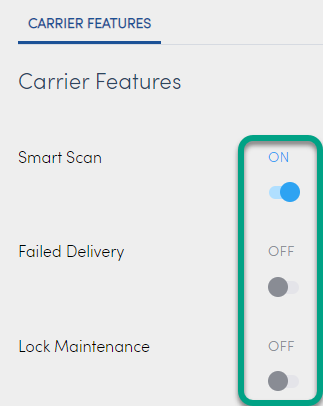
Carrier Configuration
| Carrier Feature | Description |
|---|---|
| Smart Scan | This feature allows carriers to collect and deliver packages, using a task-based process to improve scan compliance. |
| Failed Delivery | This feature allows carrier drivers to send a 'Failed Delivery' event to HQ if they cannot deliver a package. |
| Lock Maintenance | This feature allows Carrier Admins to be able to manage the locks for doors at a Location. |
Use Configure in Konnect HQ to switch on/off carrier features.
To switch a feature on/off:
- Select Core > Carriers.
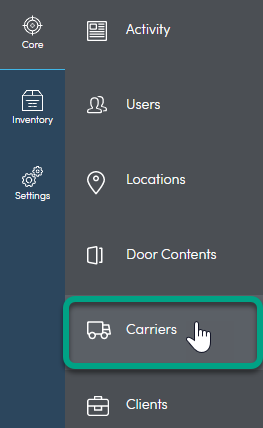
- Select the blue arrow beside the carrier you want to view.
- Select Configure.
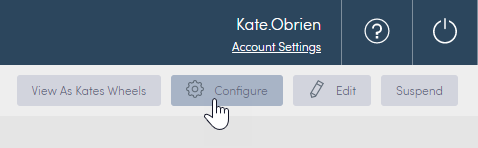
- Switch the feature on/off using the toggle.