Login into Salesforce application with given credentials.
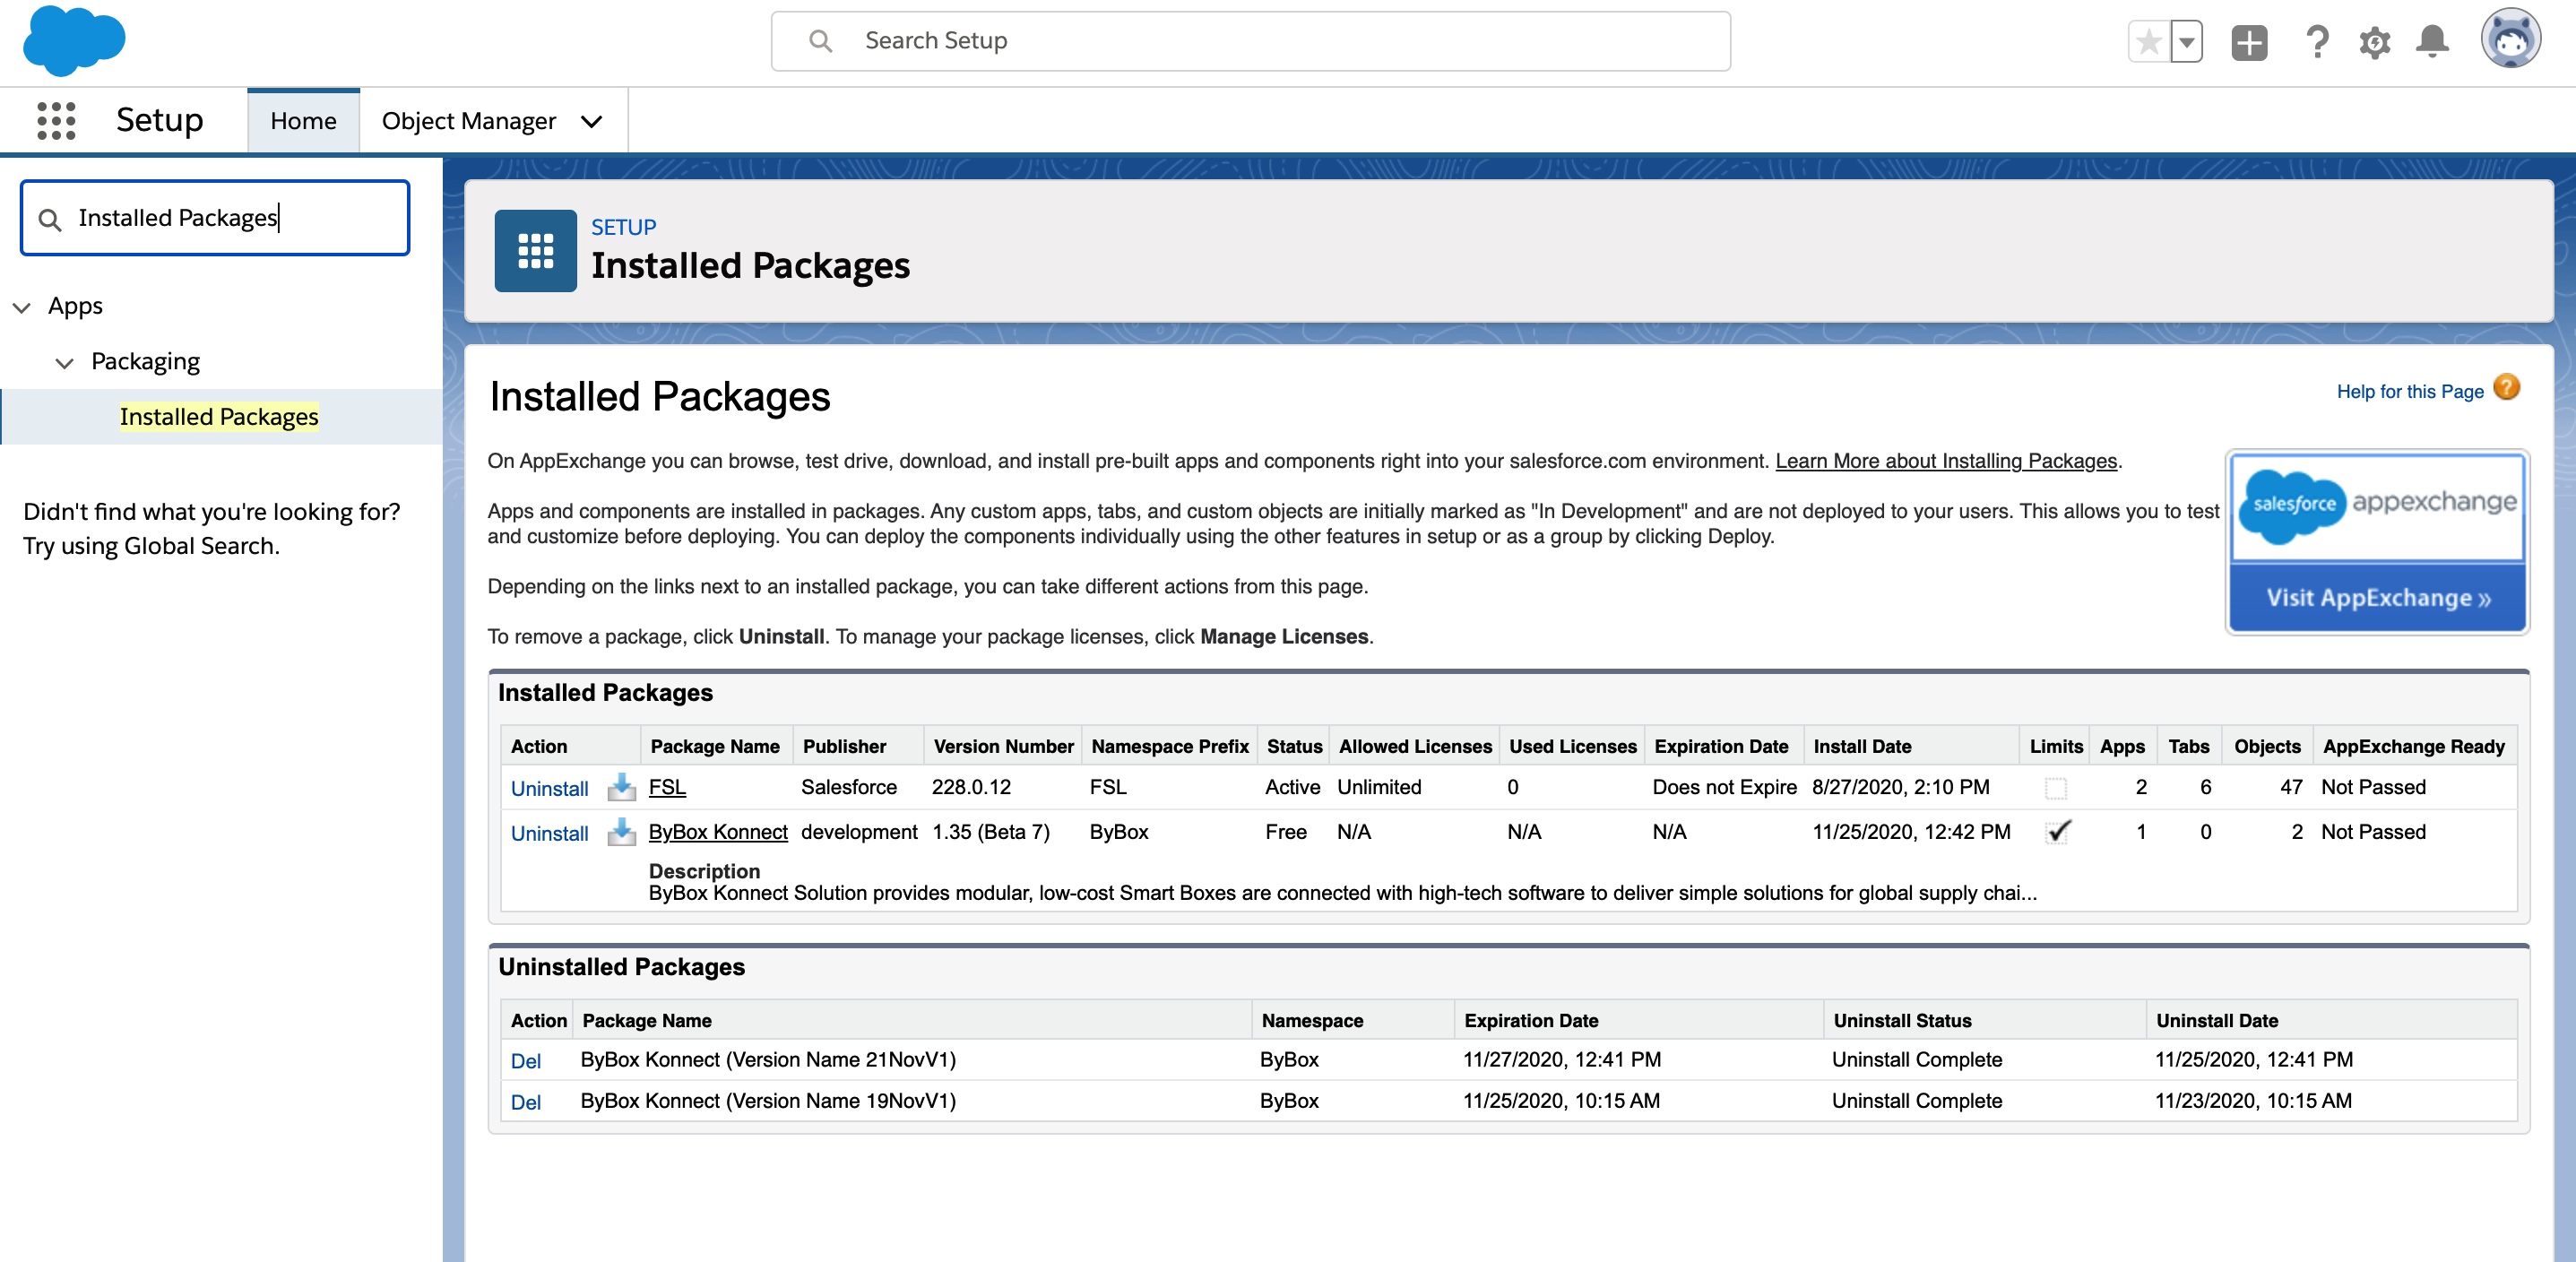
Go to SetUp >Installed Packages. Verify if appropriate package and version has been installed.
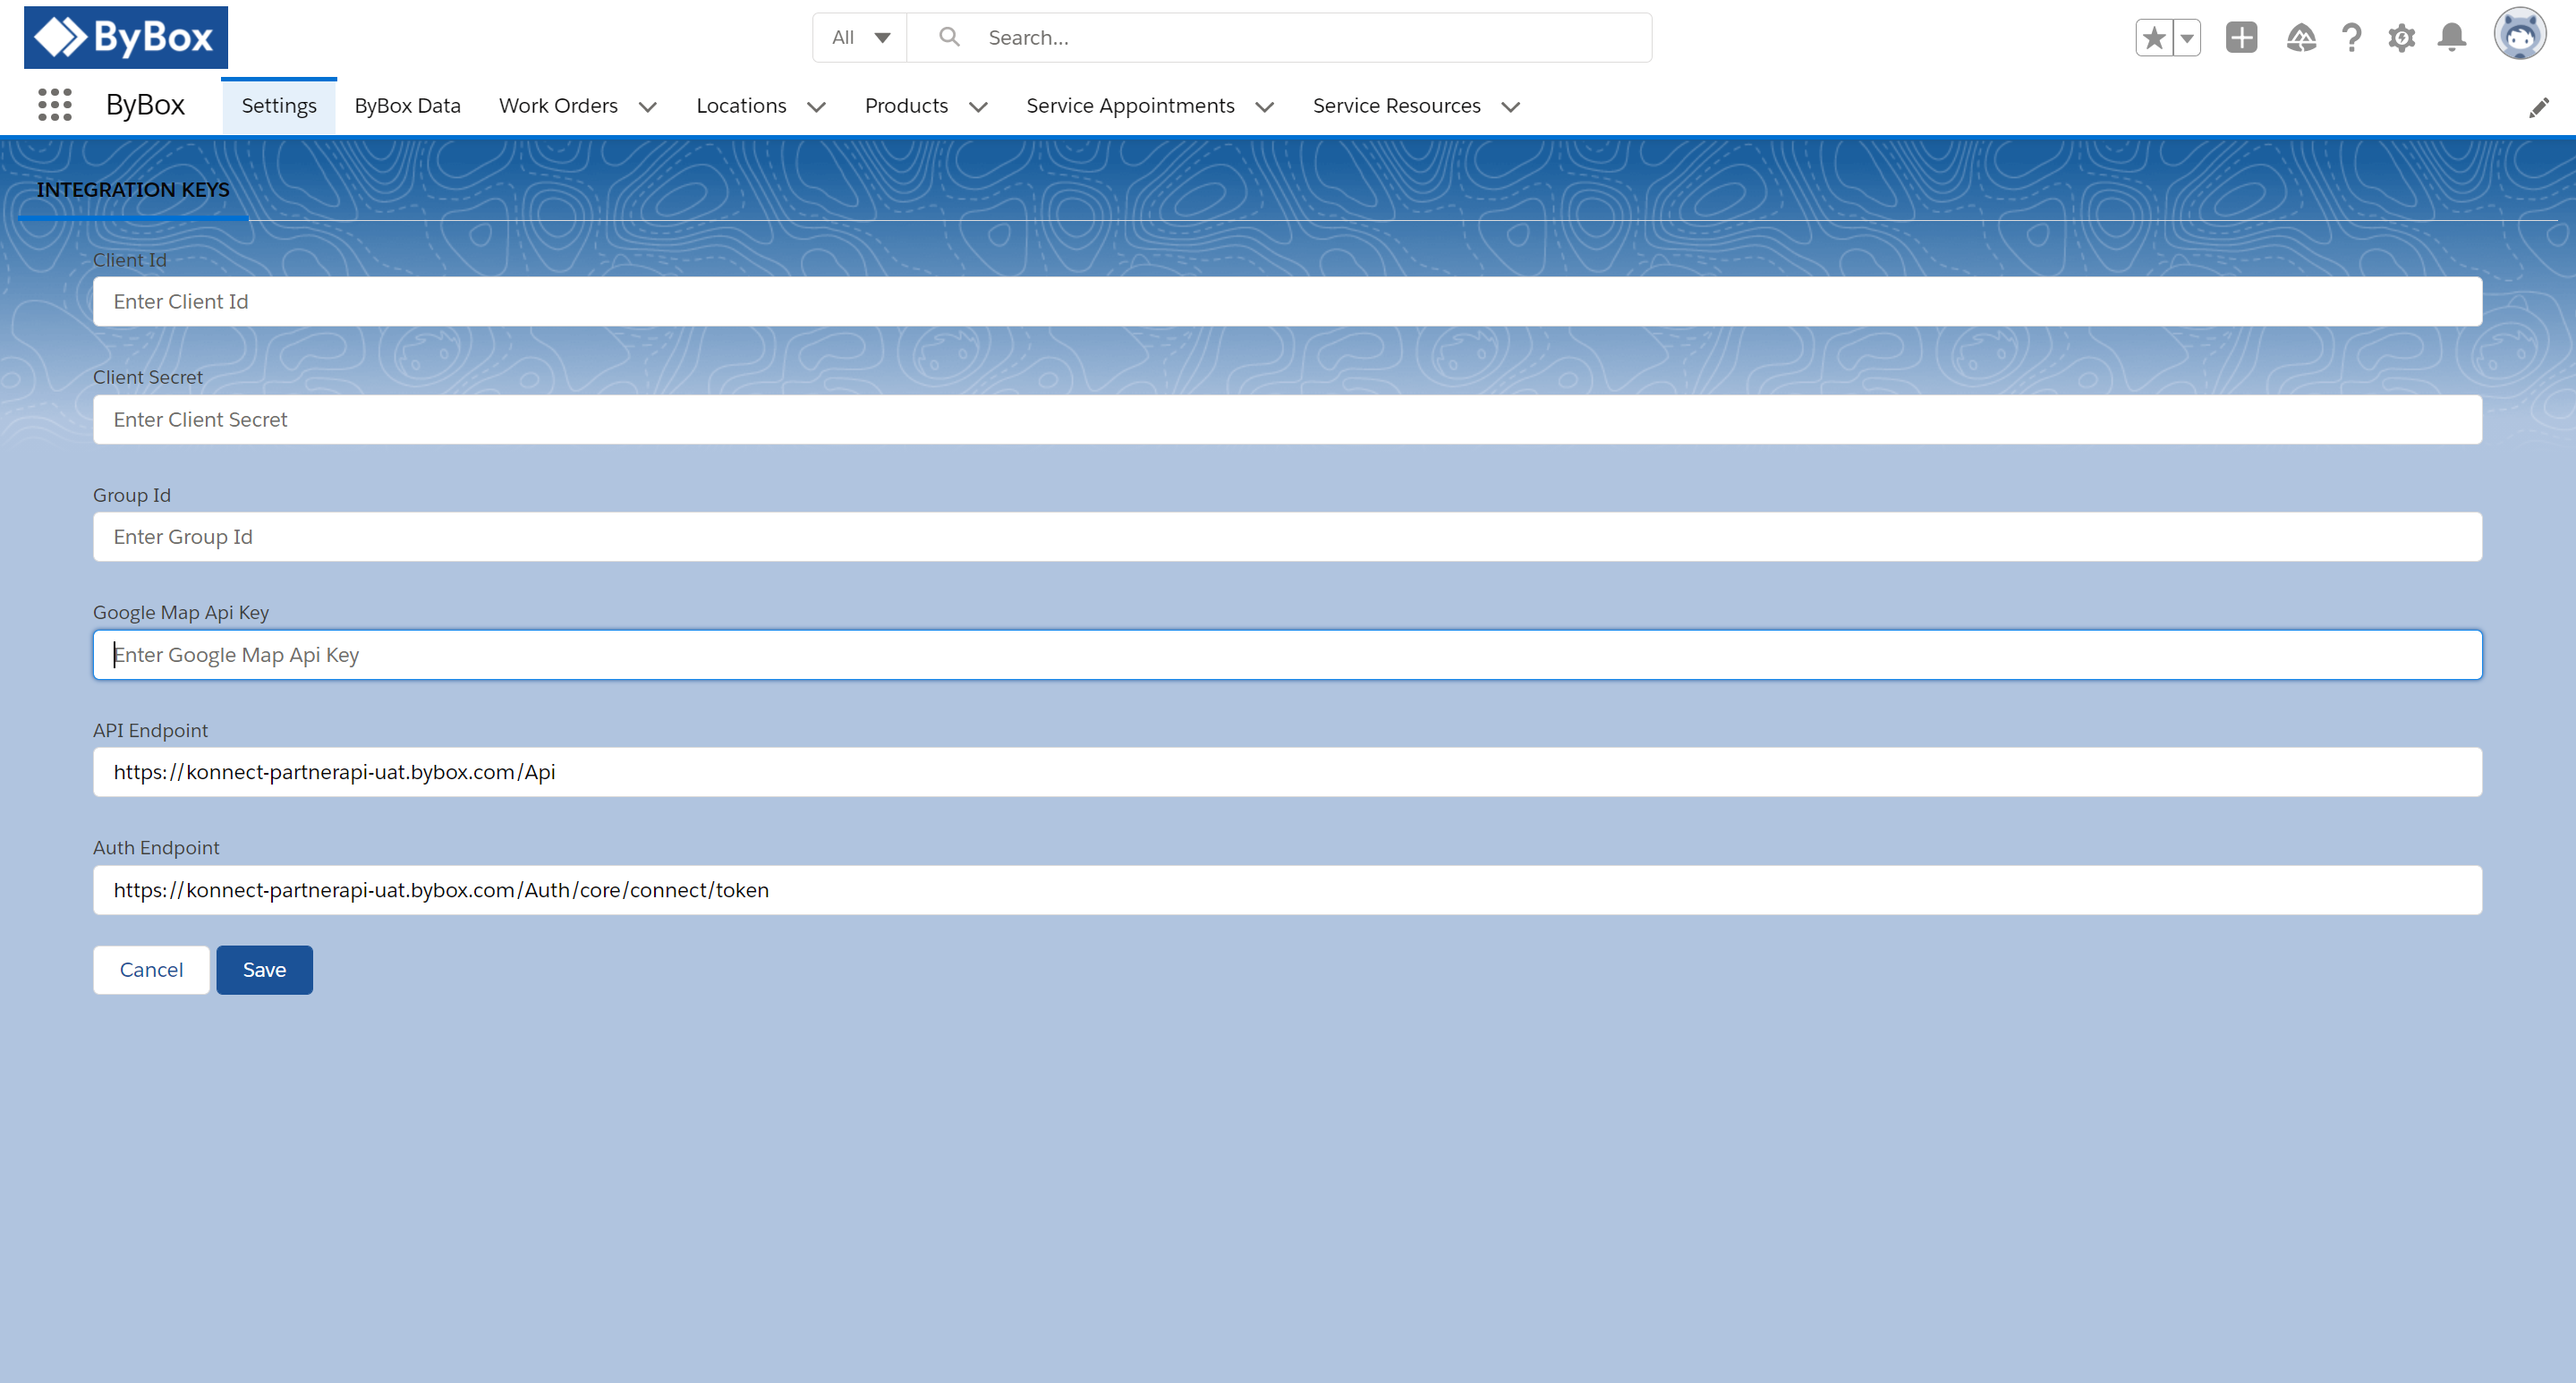
Go to Settings under ByBox app and verify if the configurations are entered correctly.
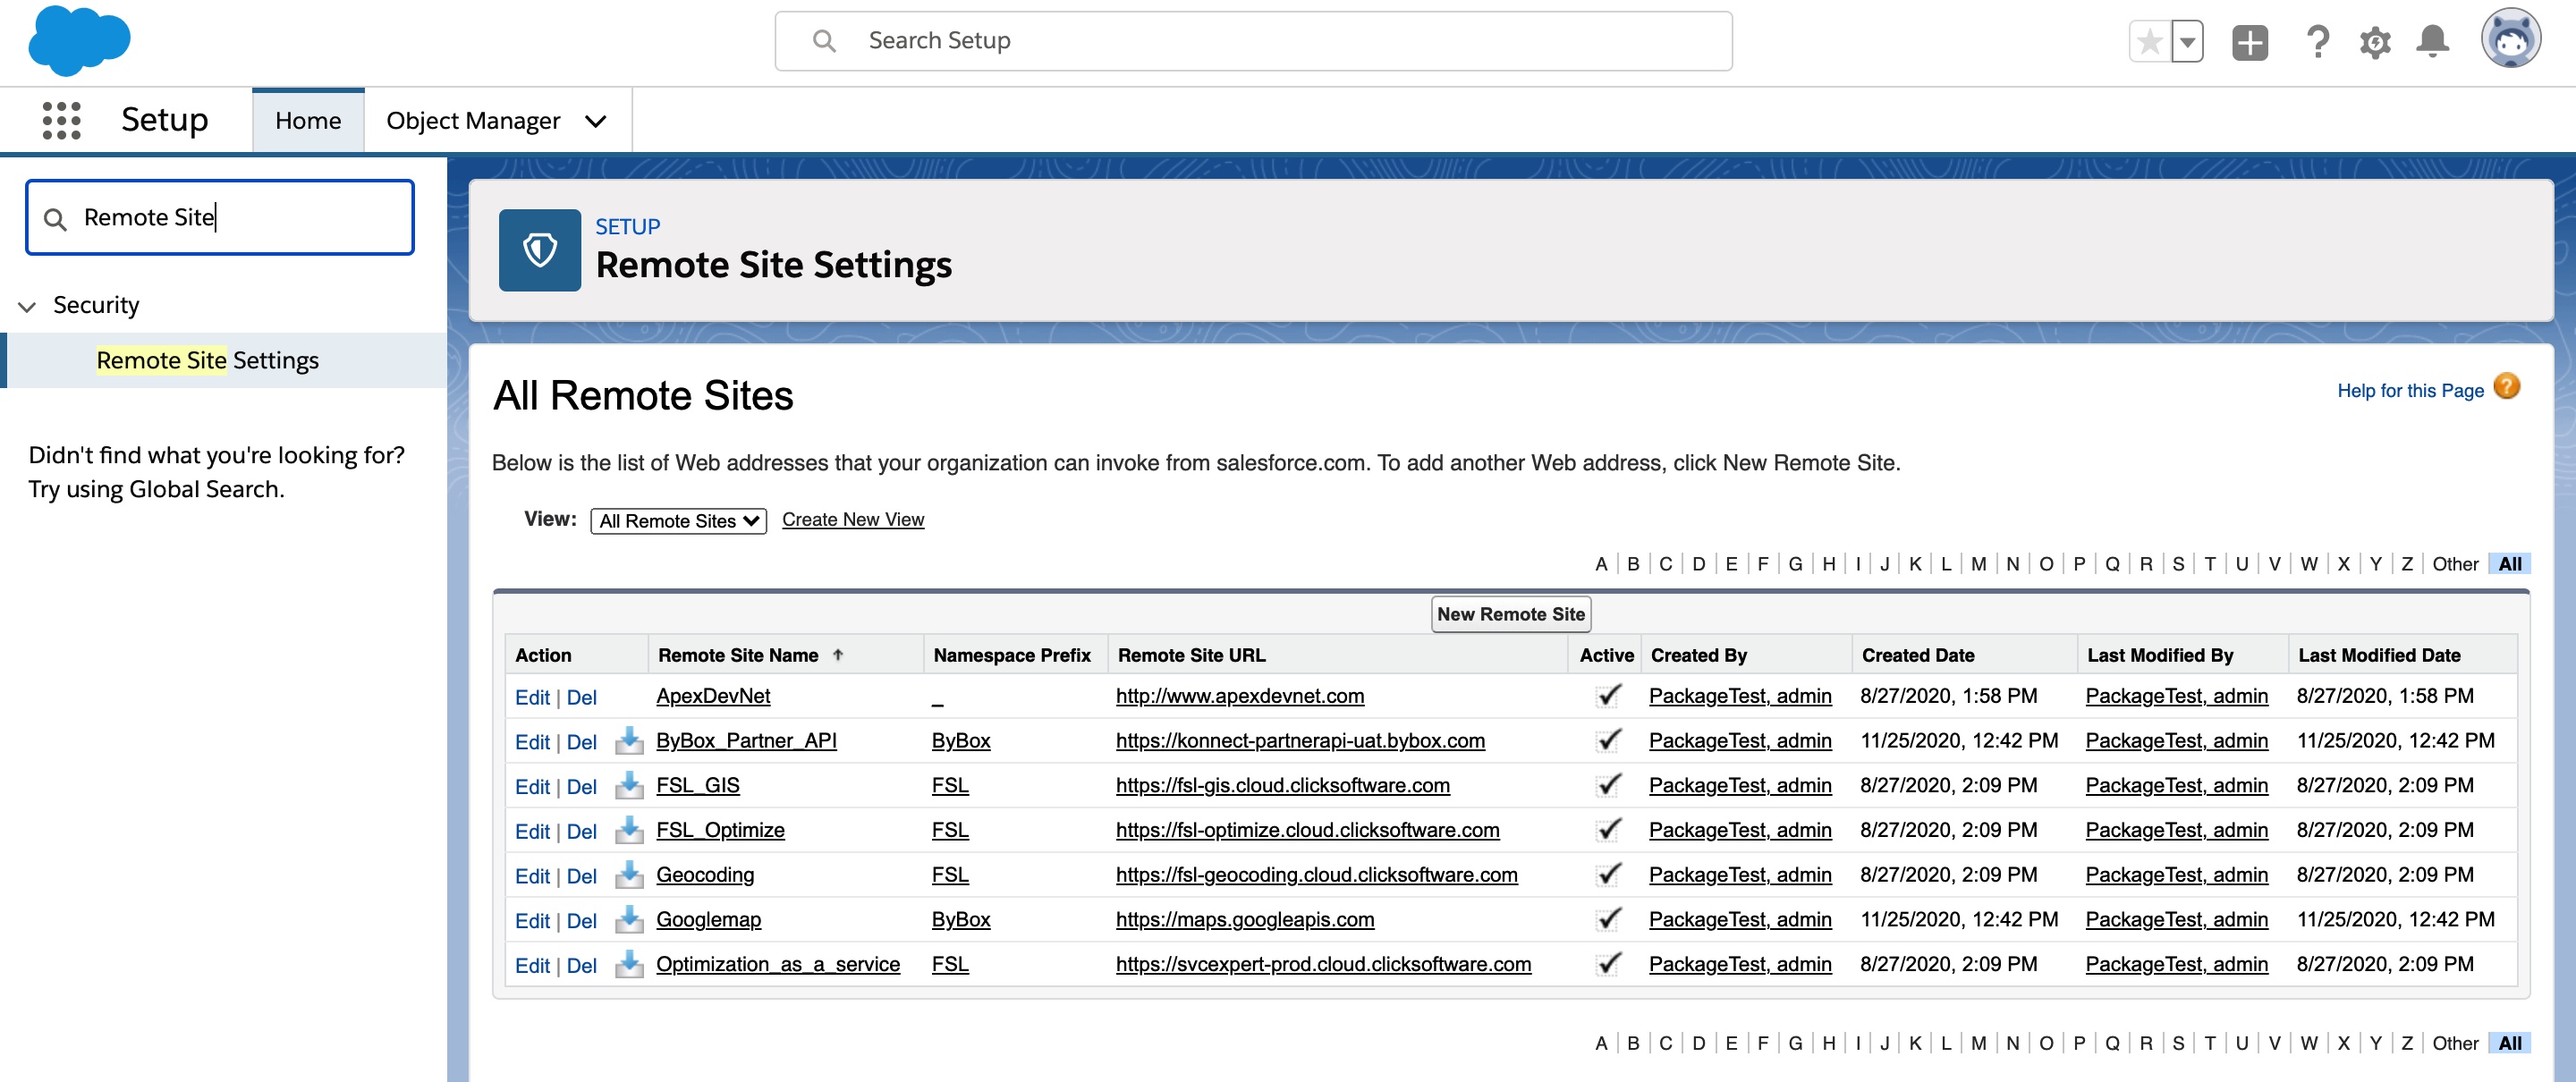
Go to SetUp > Remote Site Settings. View and verify if the ByBox URL is displayed correctly.
Go to SetUp > Scheduled Jobs. View and verify if all the background scheduled jobs are displayed.
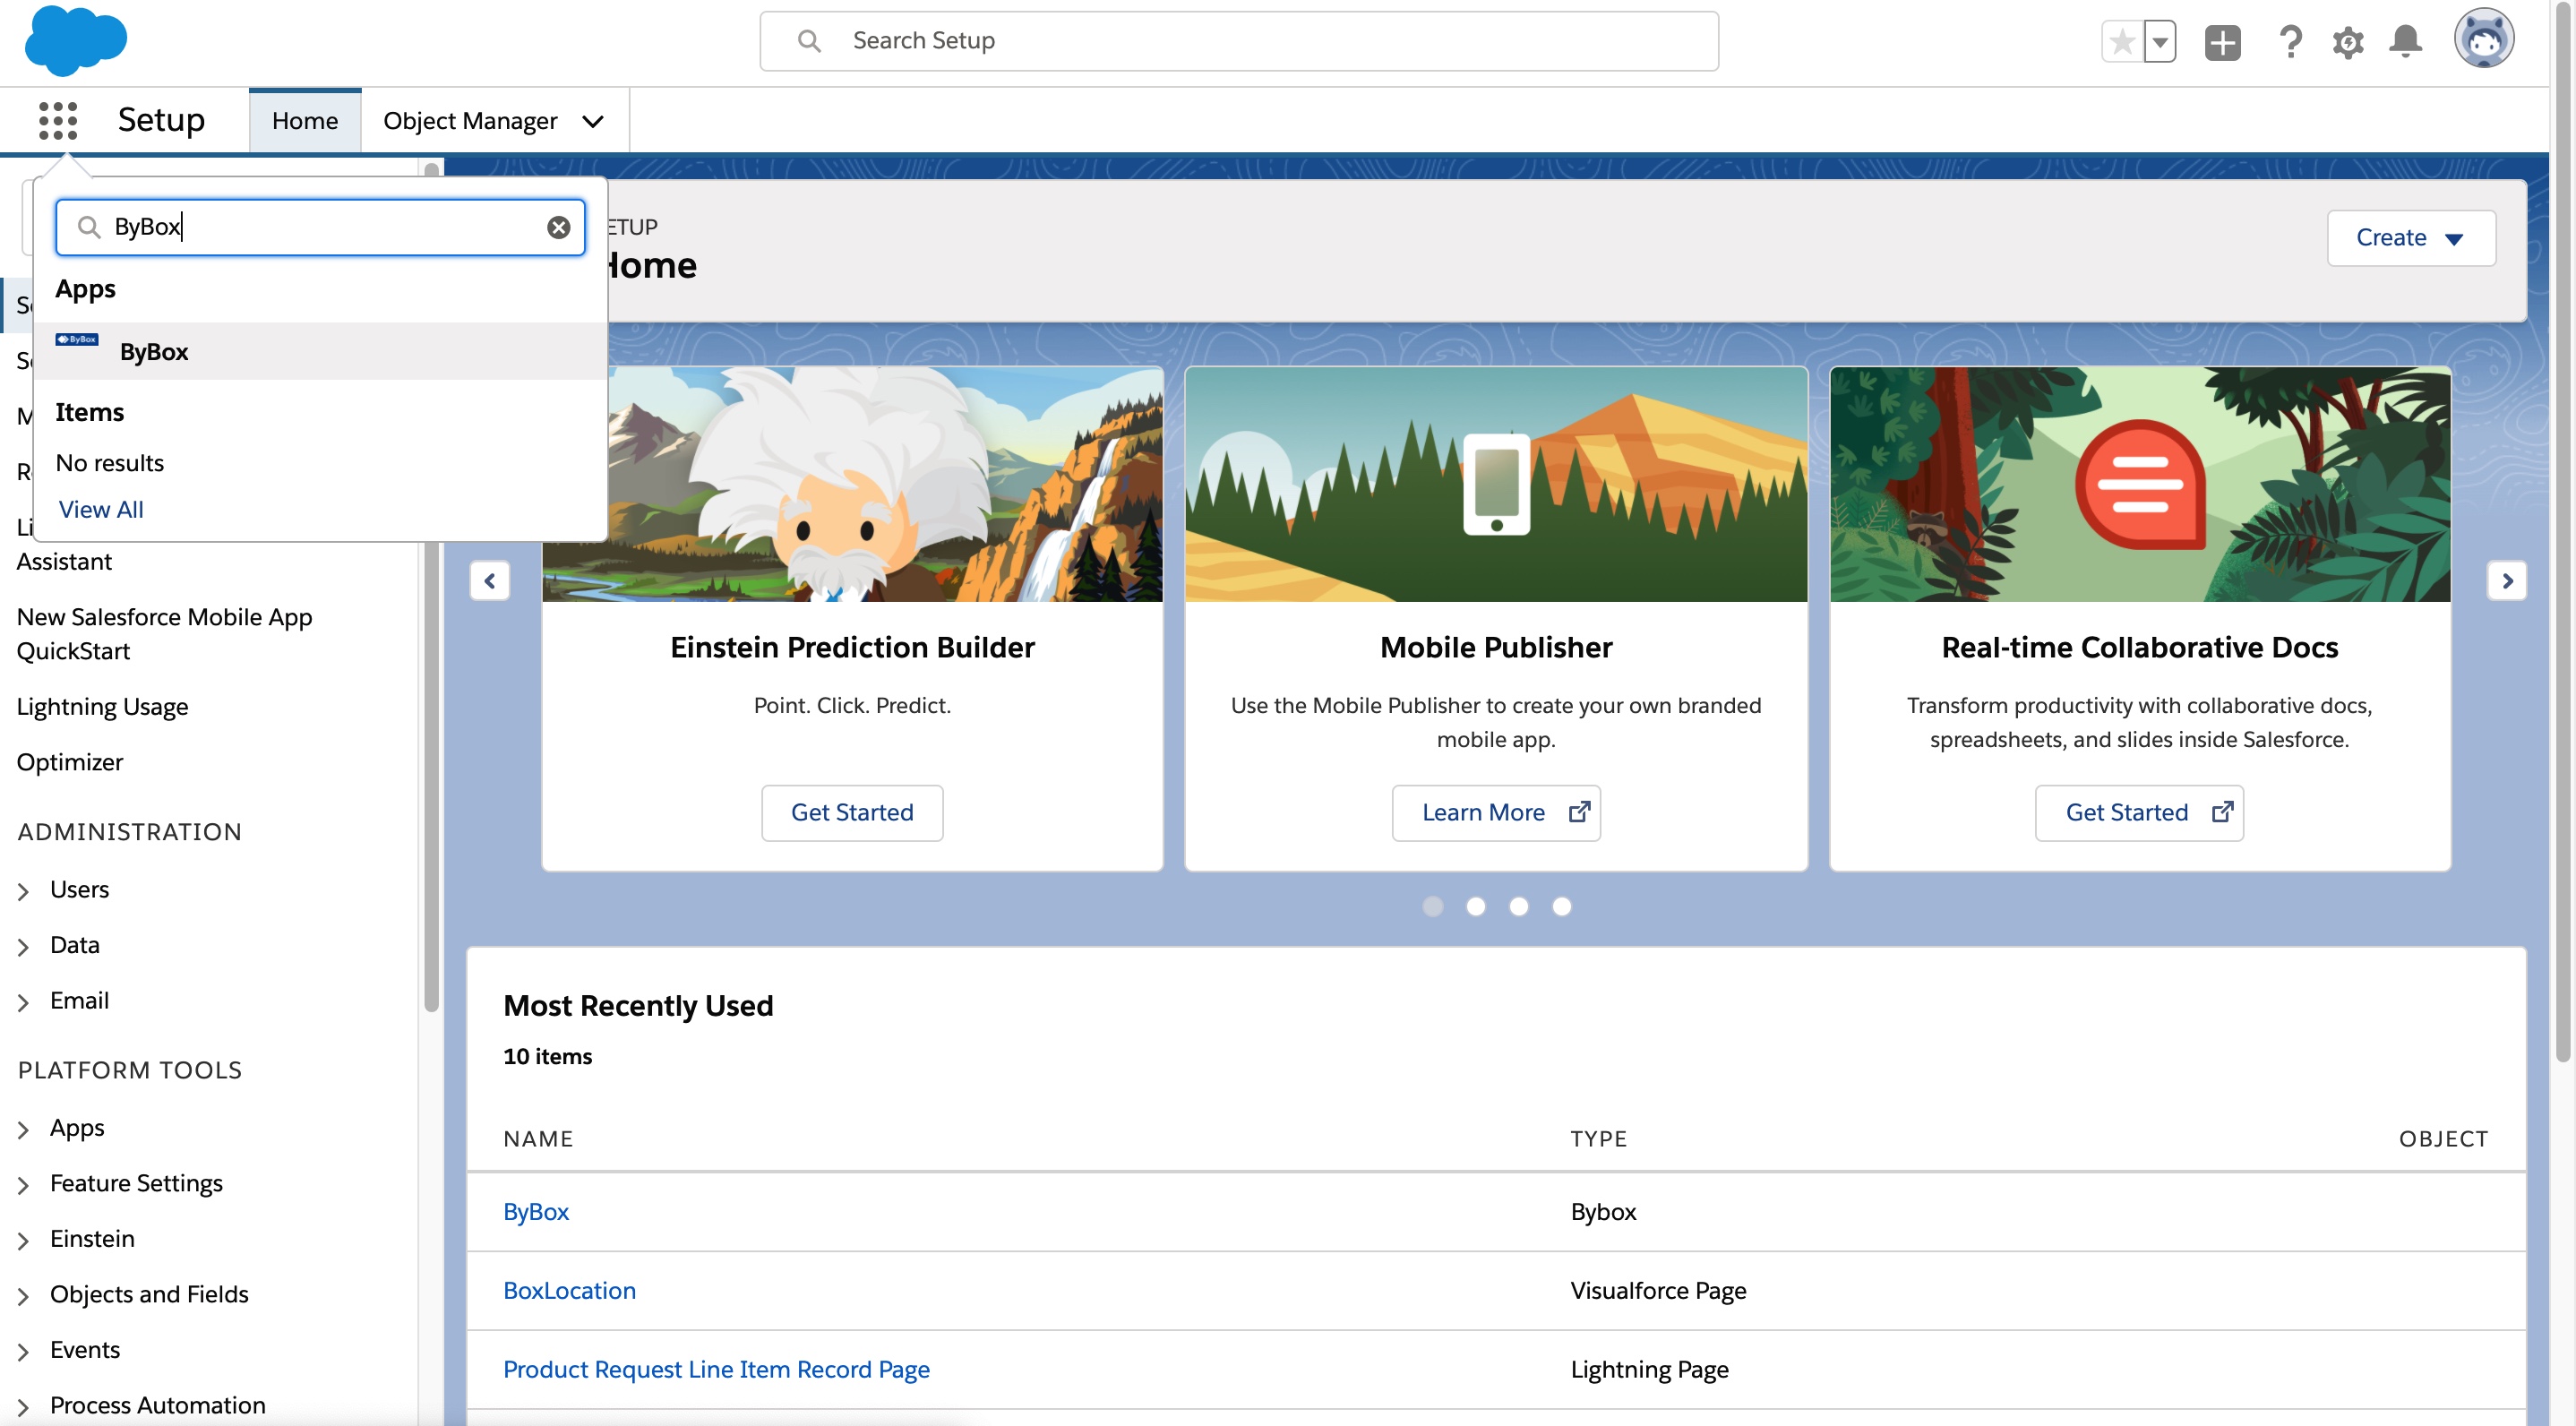
Go to App Launcher and search for the application name. Click on the application once it is found.
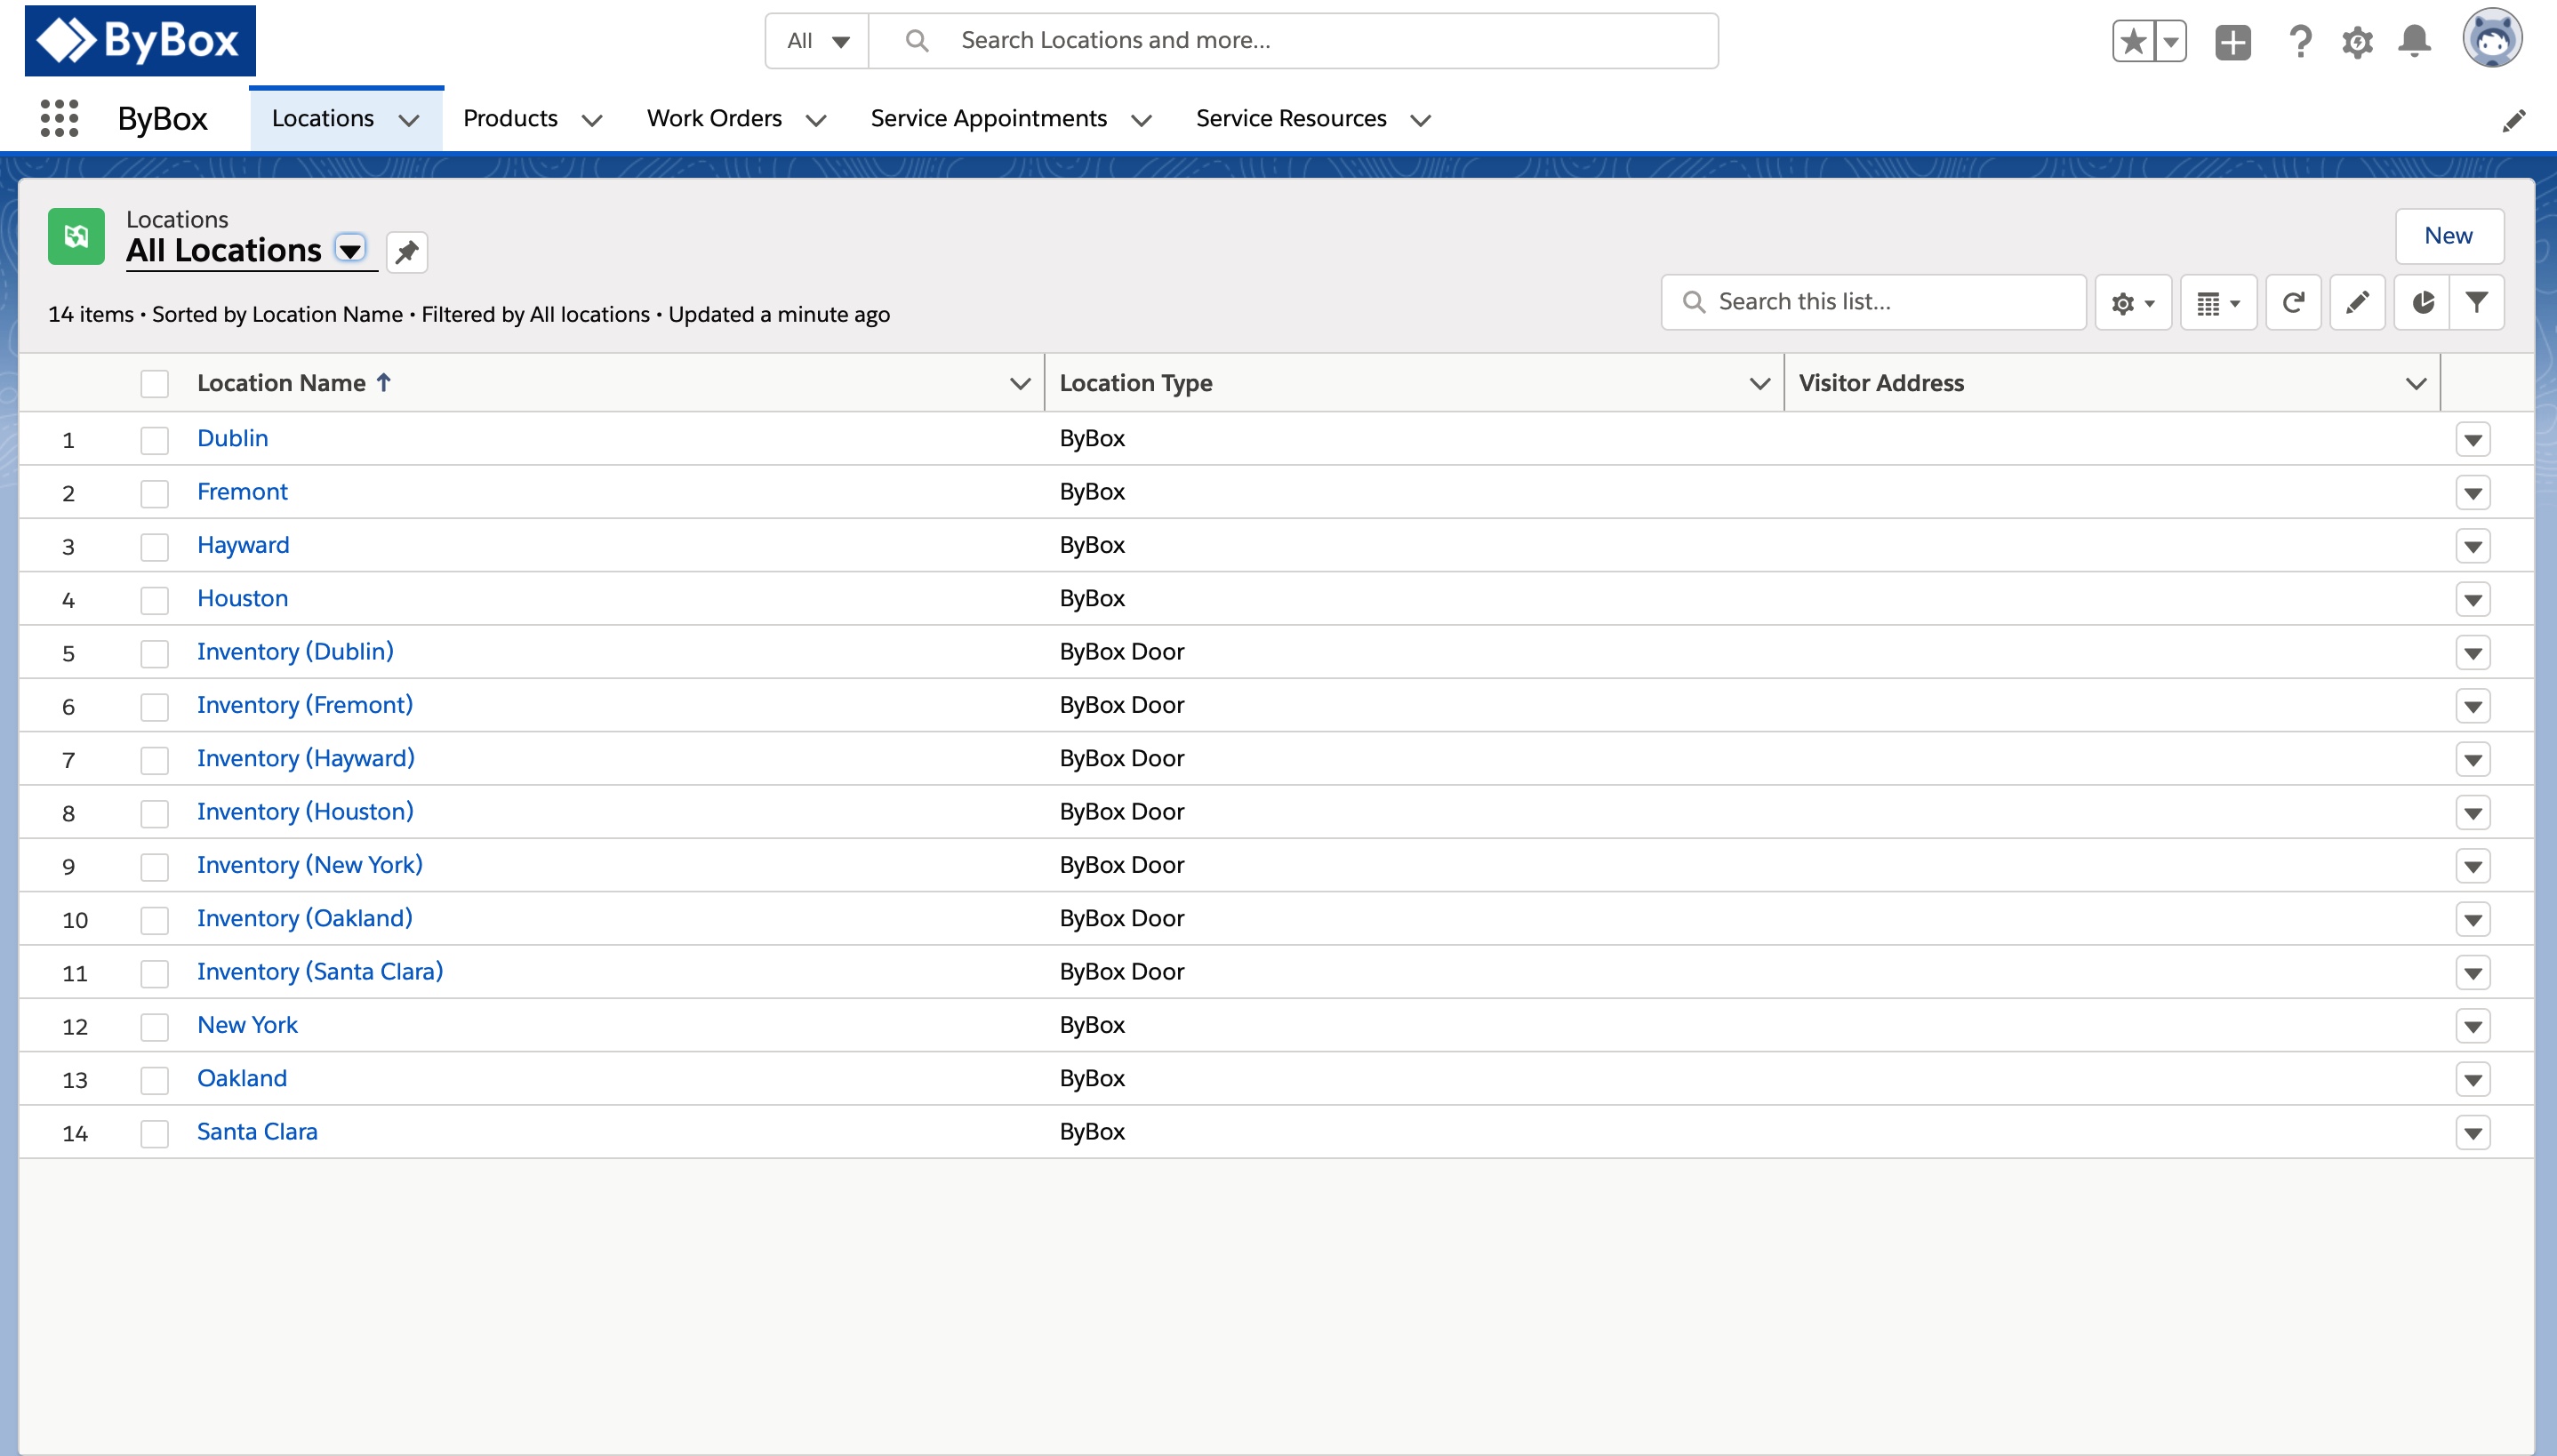
Go to Location tab and view all the Location/Door data fetched from ByBox.
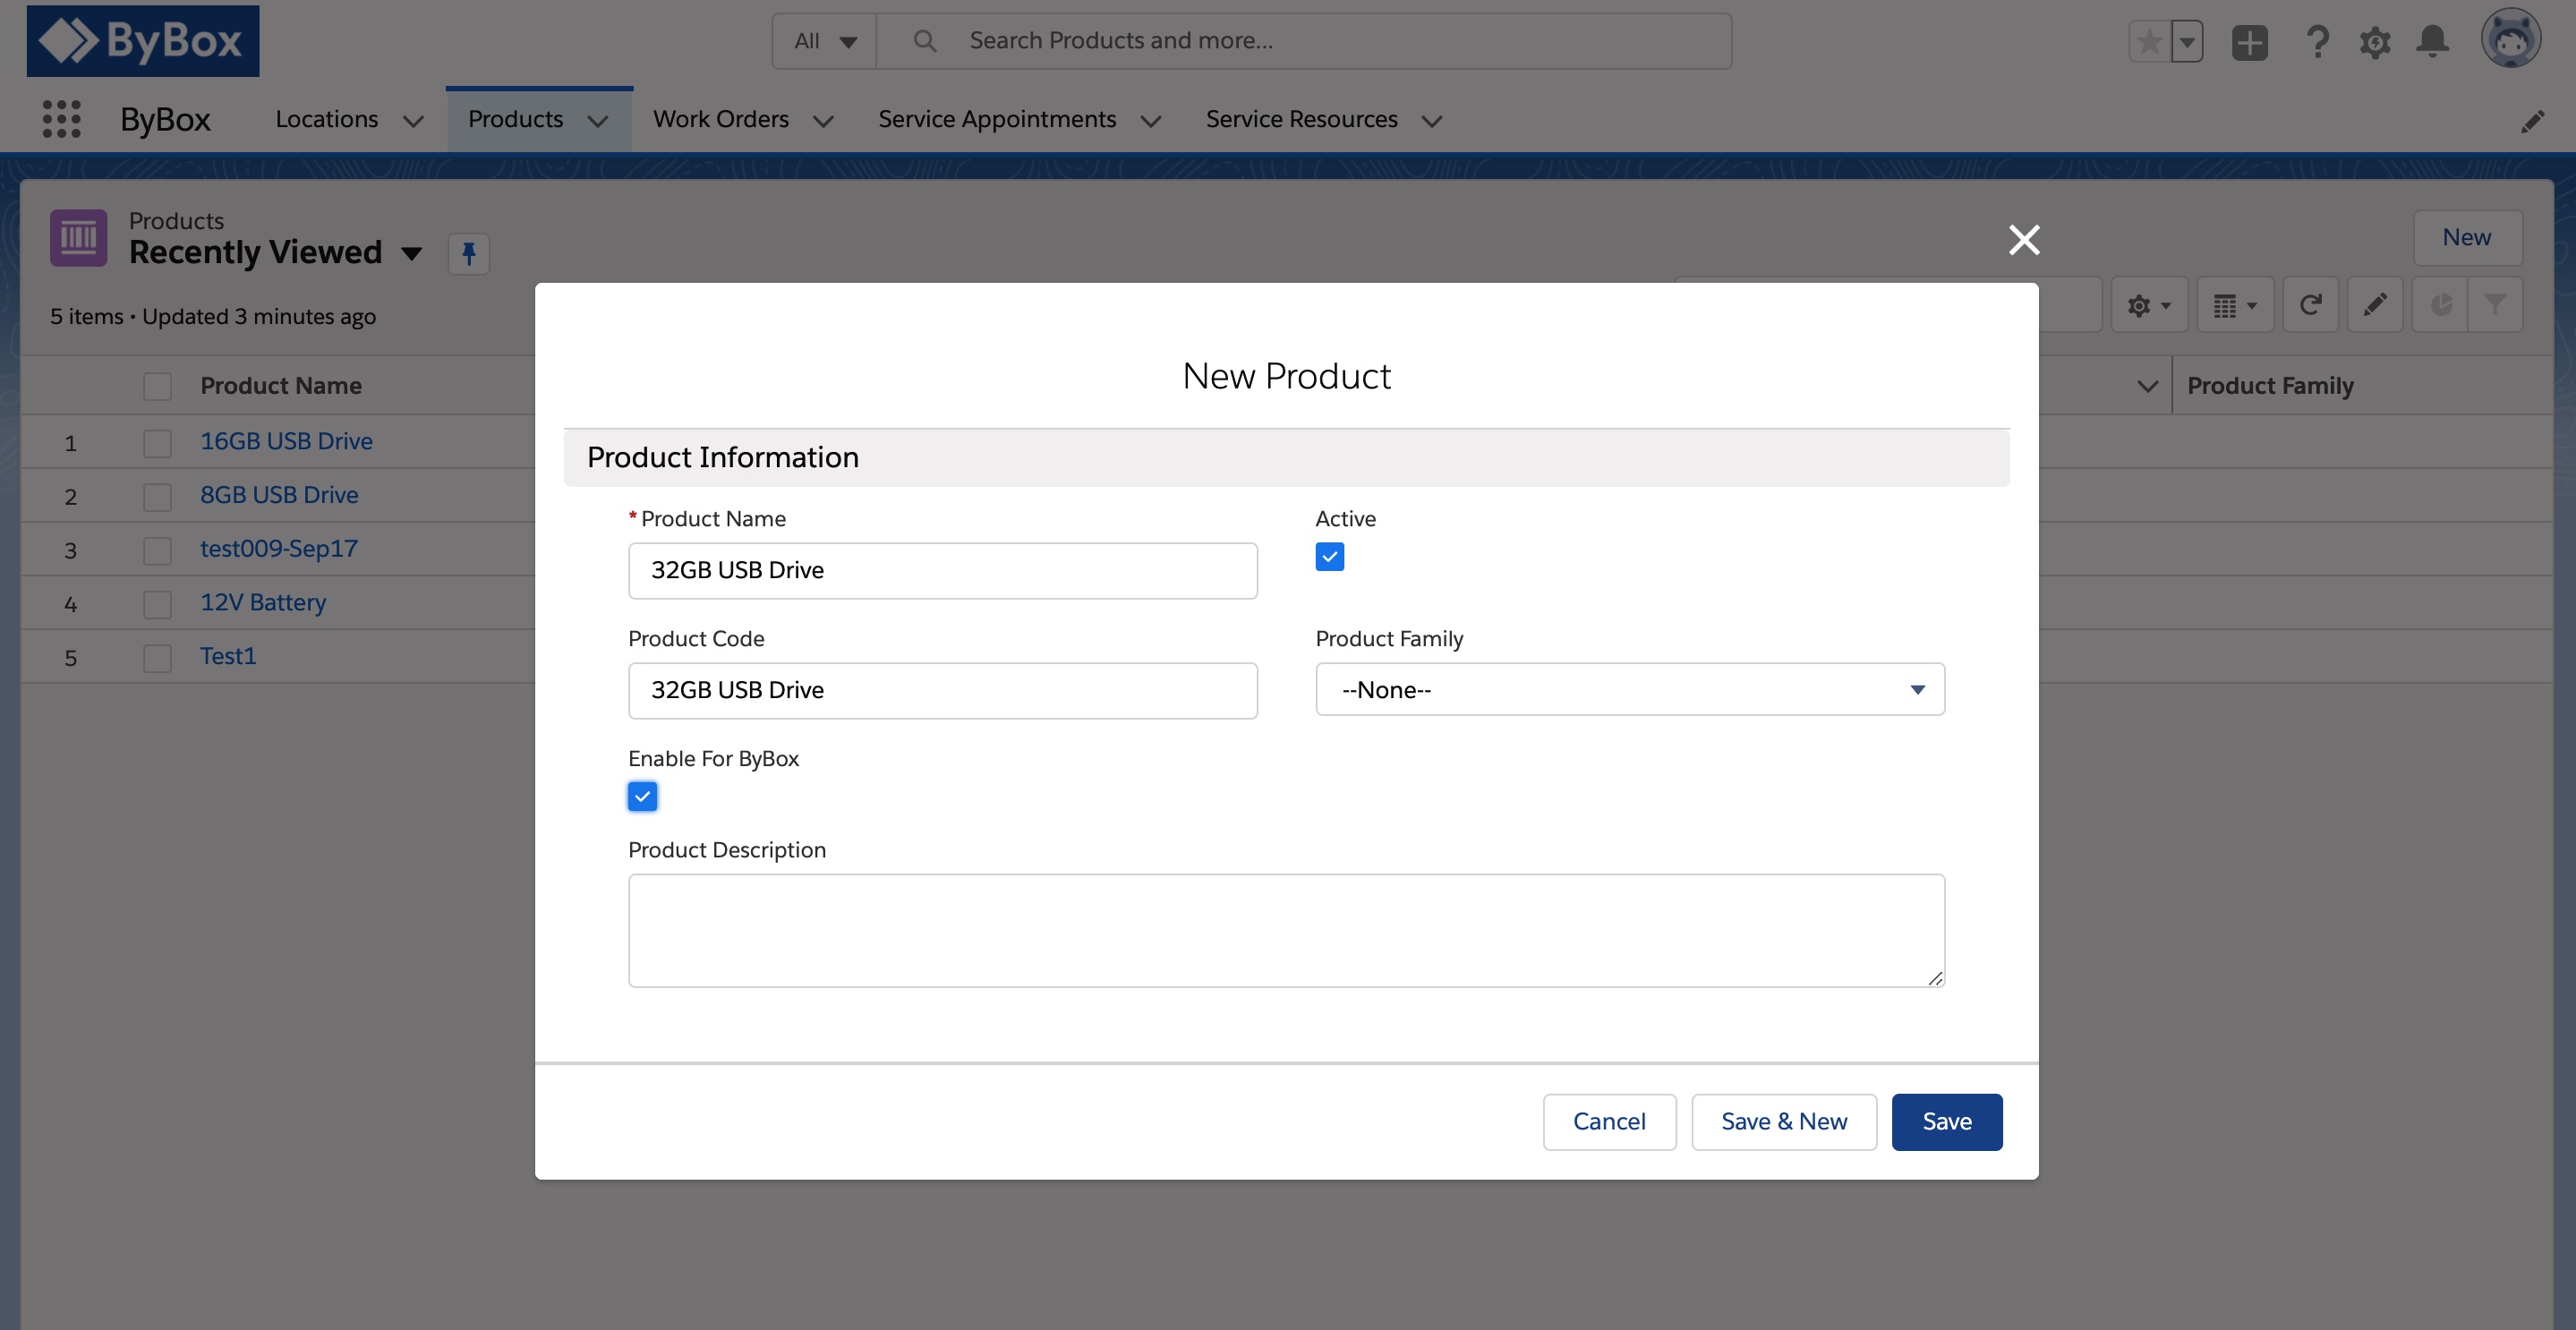
Go to Products tab and create a new product based on the fields provided.
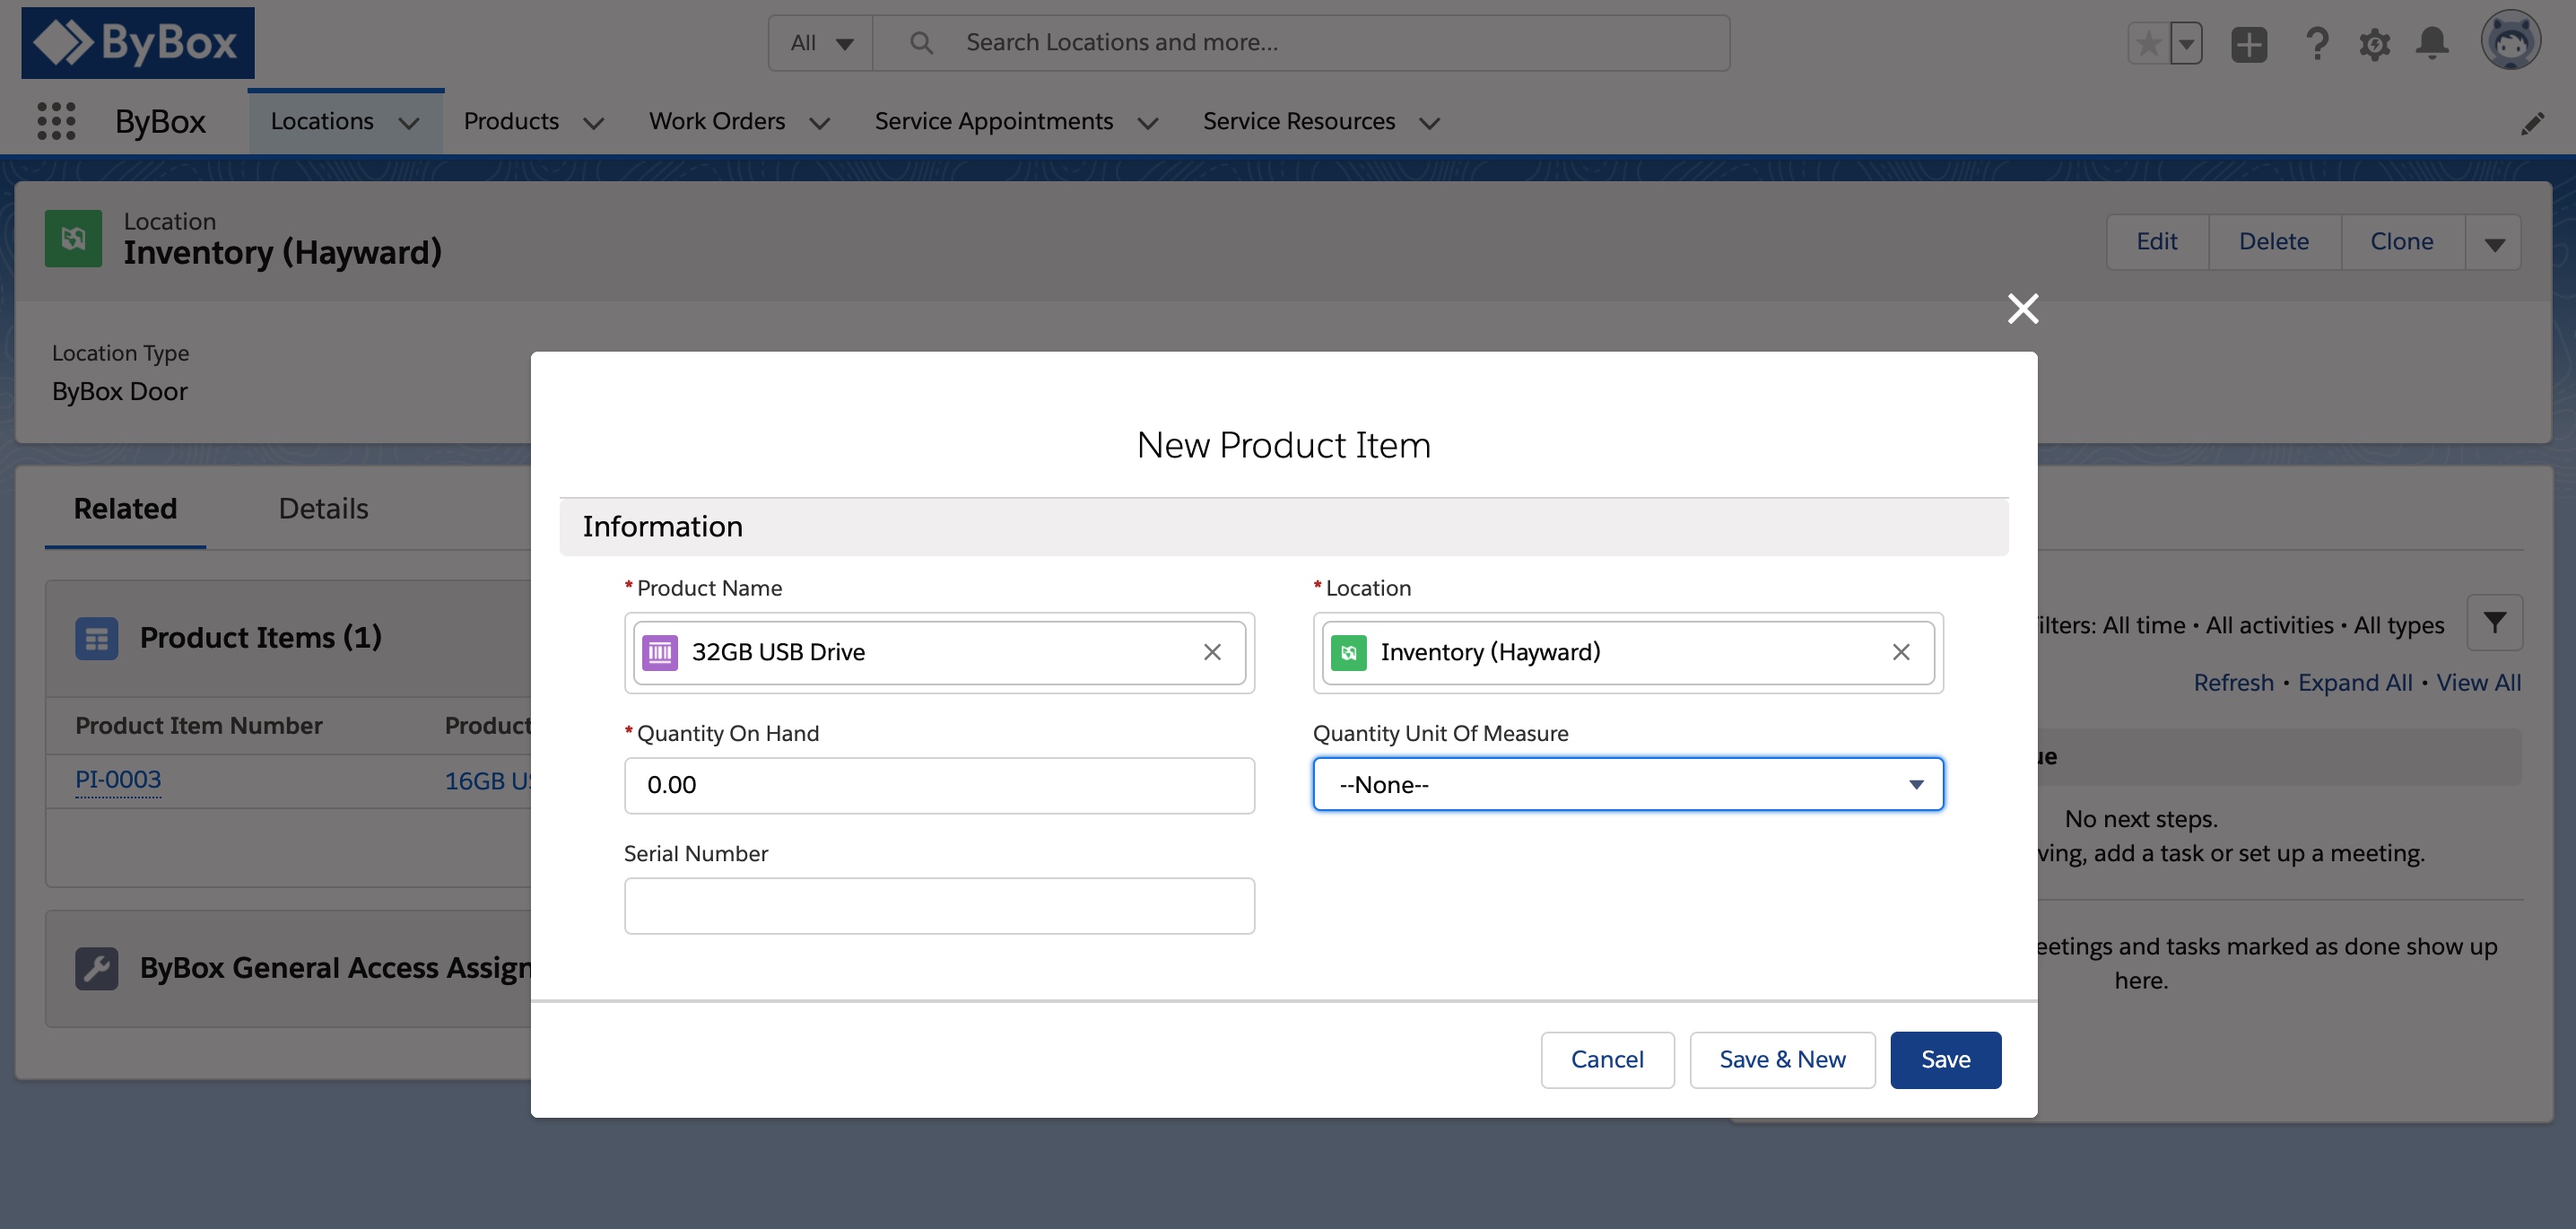
Go to Locations tab and click on any ByBox Door. Create new Product Item and map the product to ByBox Door.
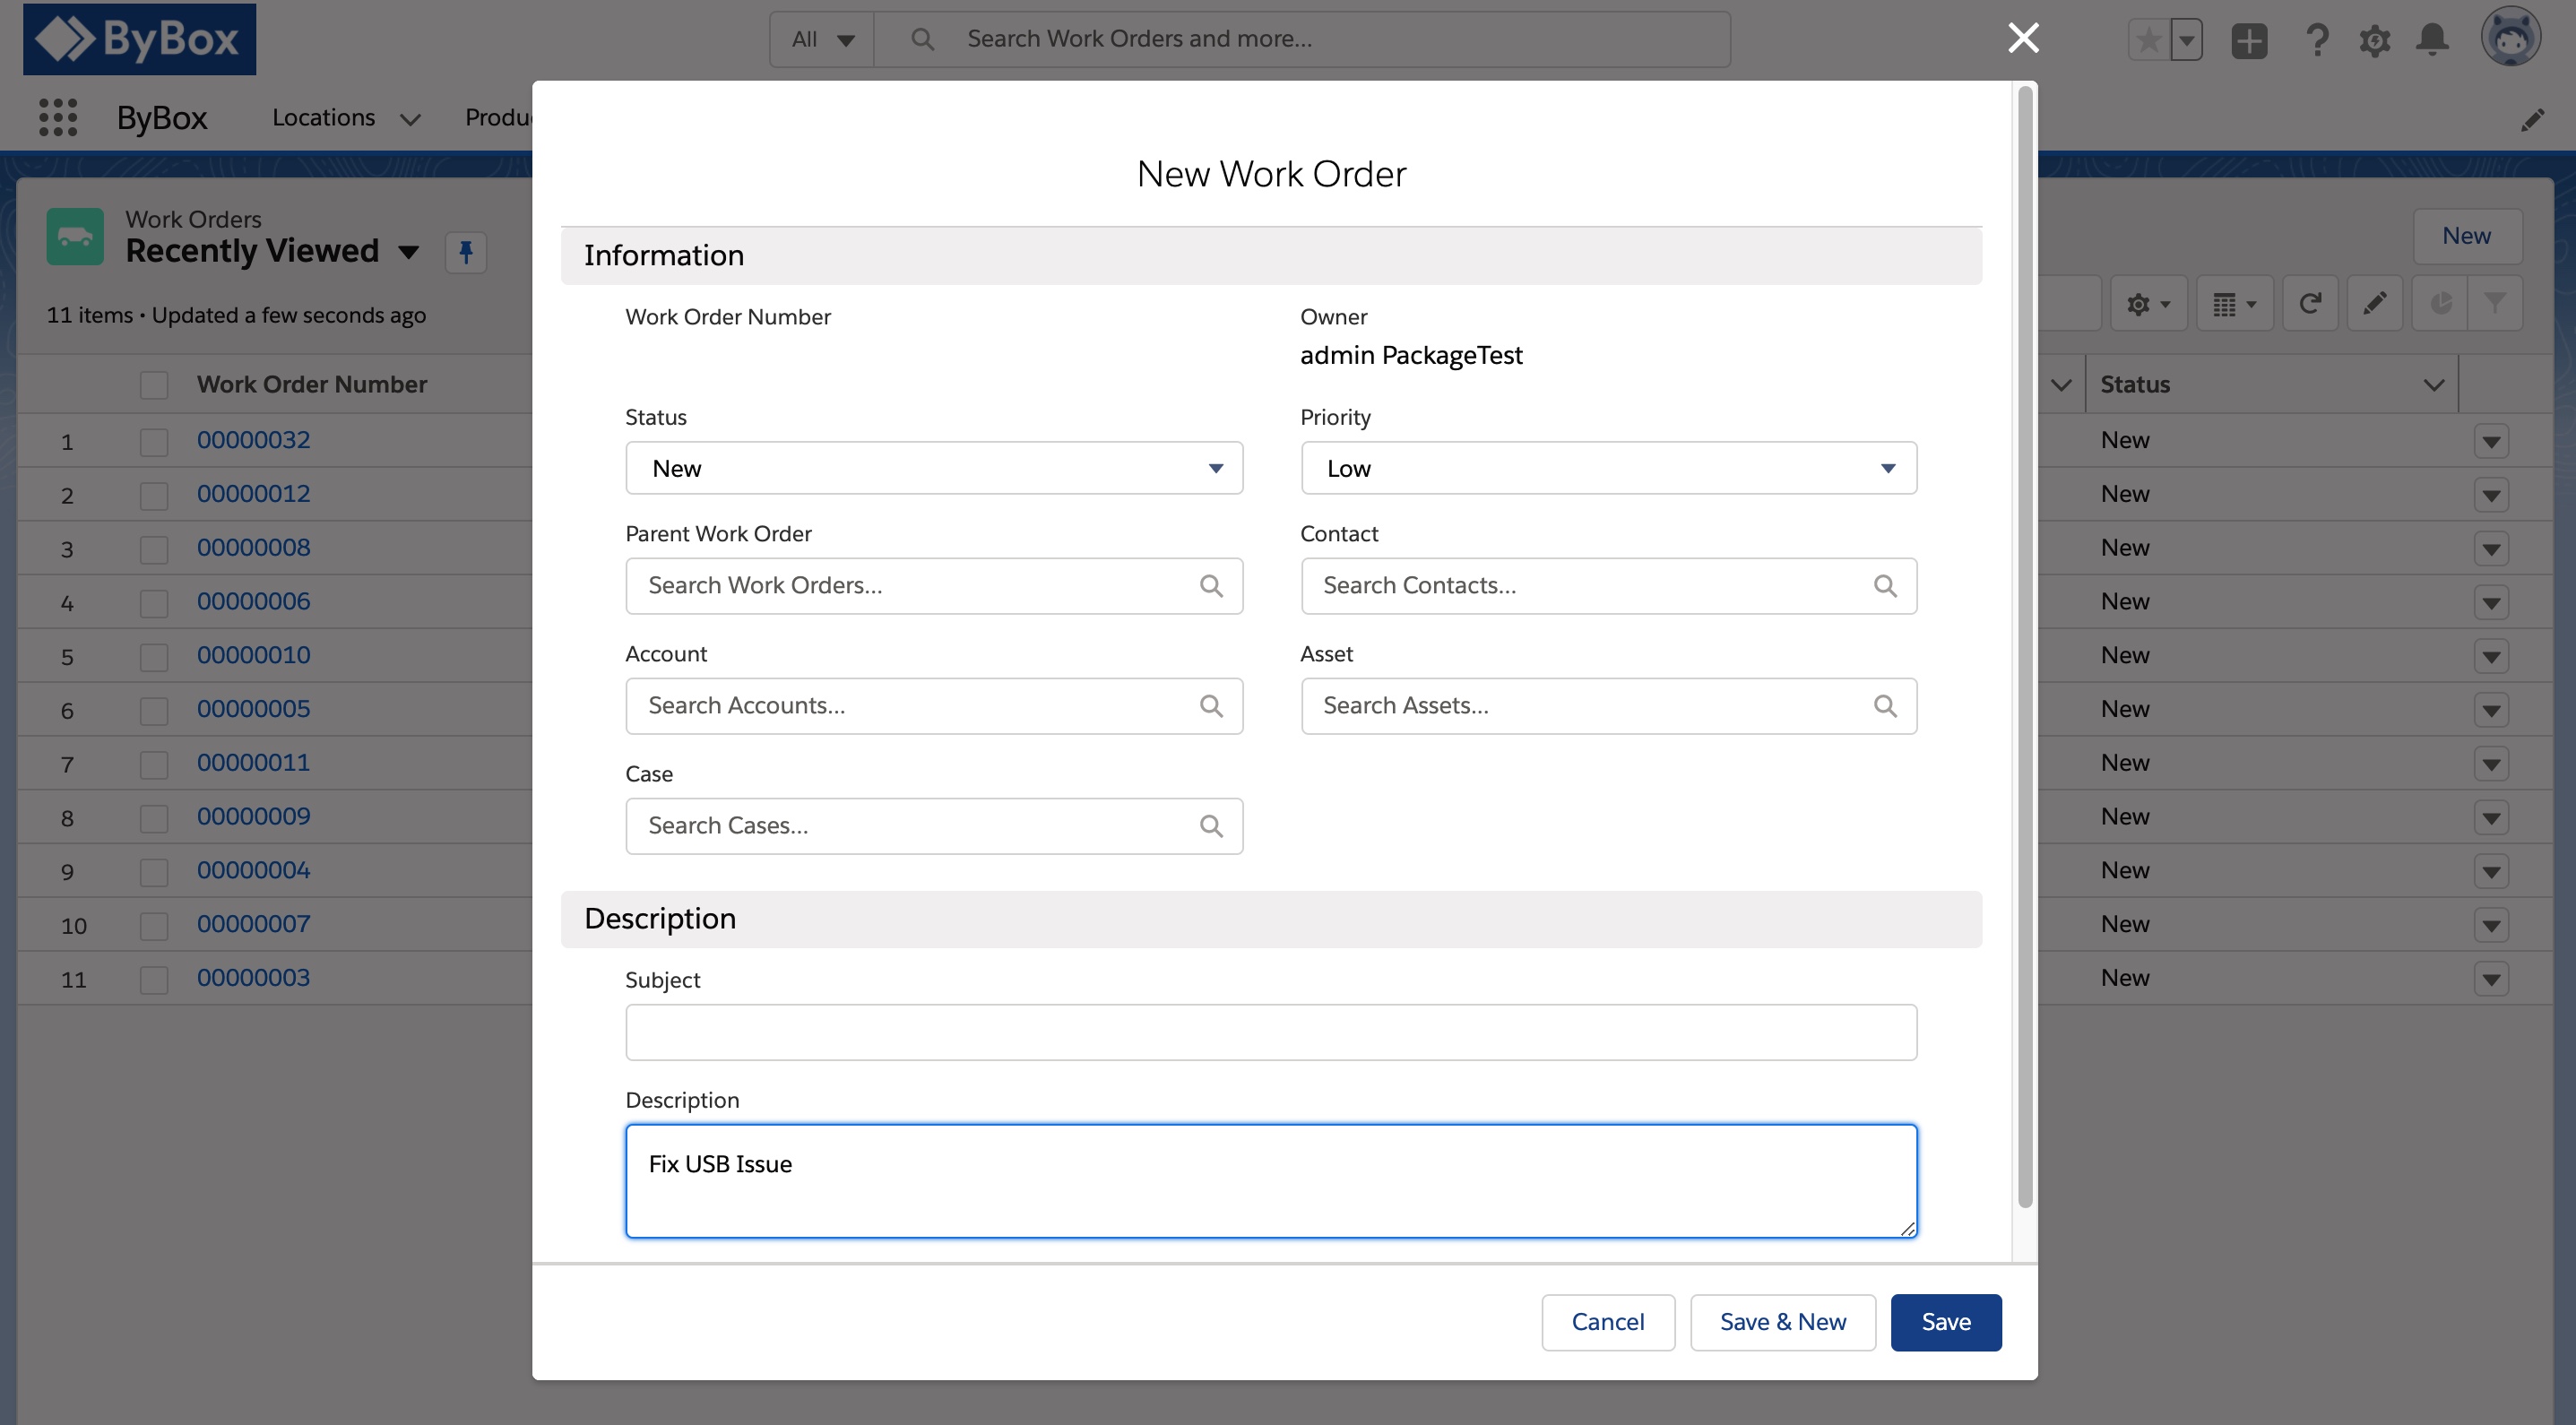
Go to Work Order tab and create new Work Order.
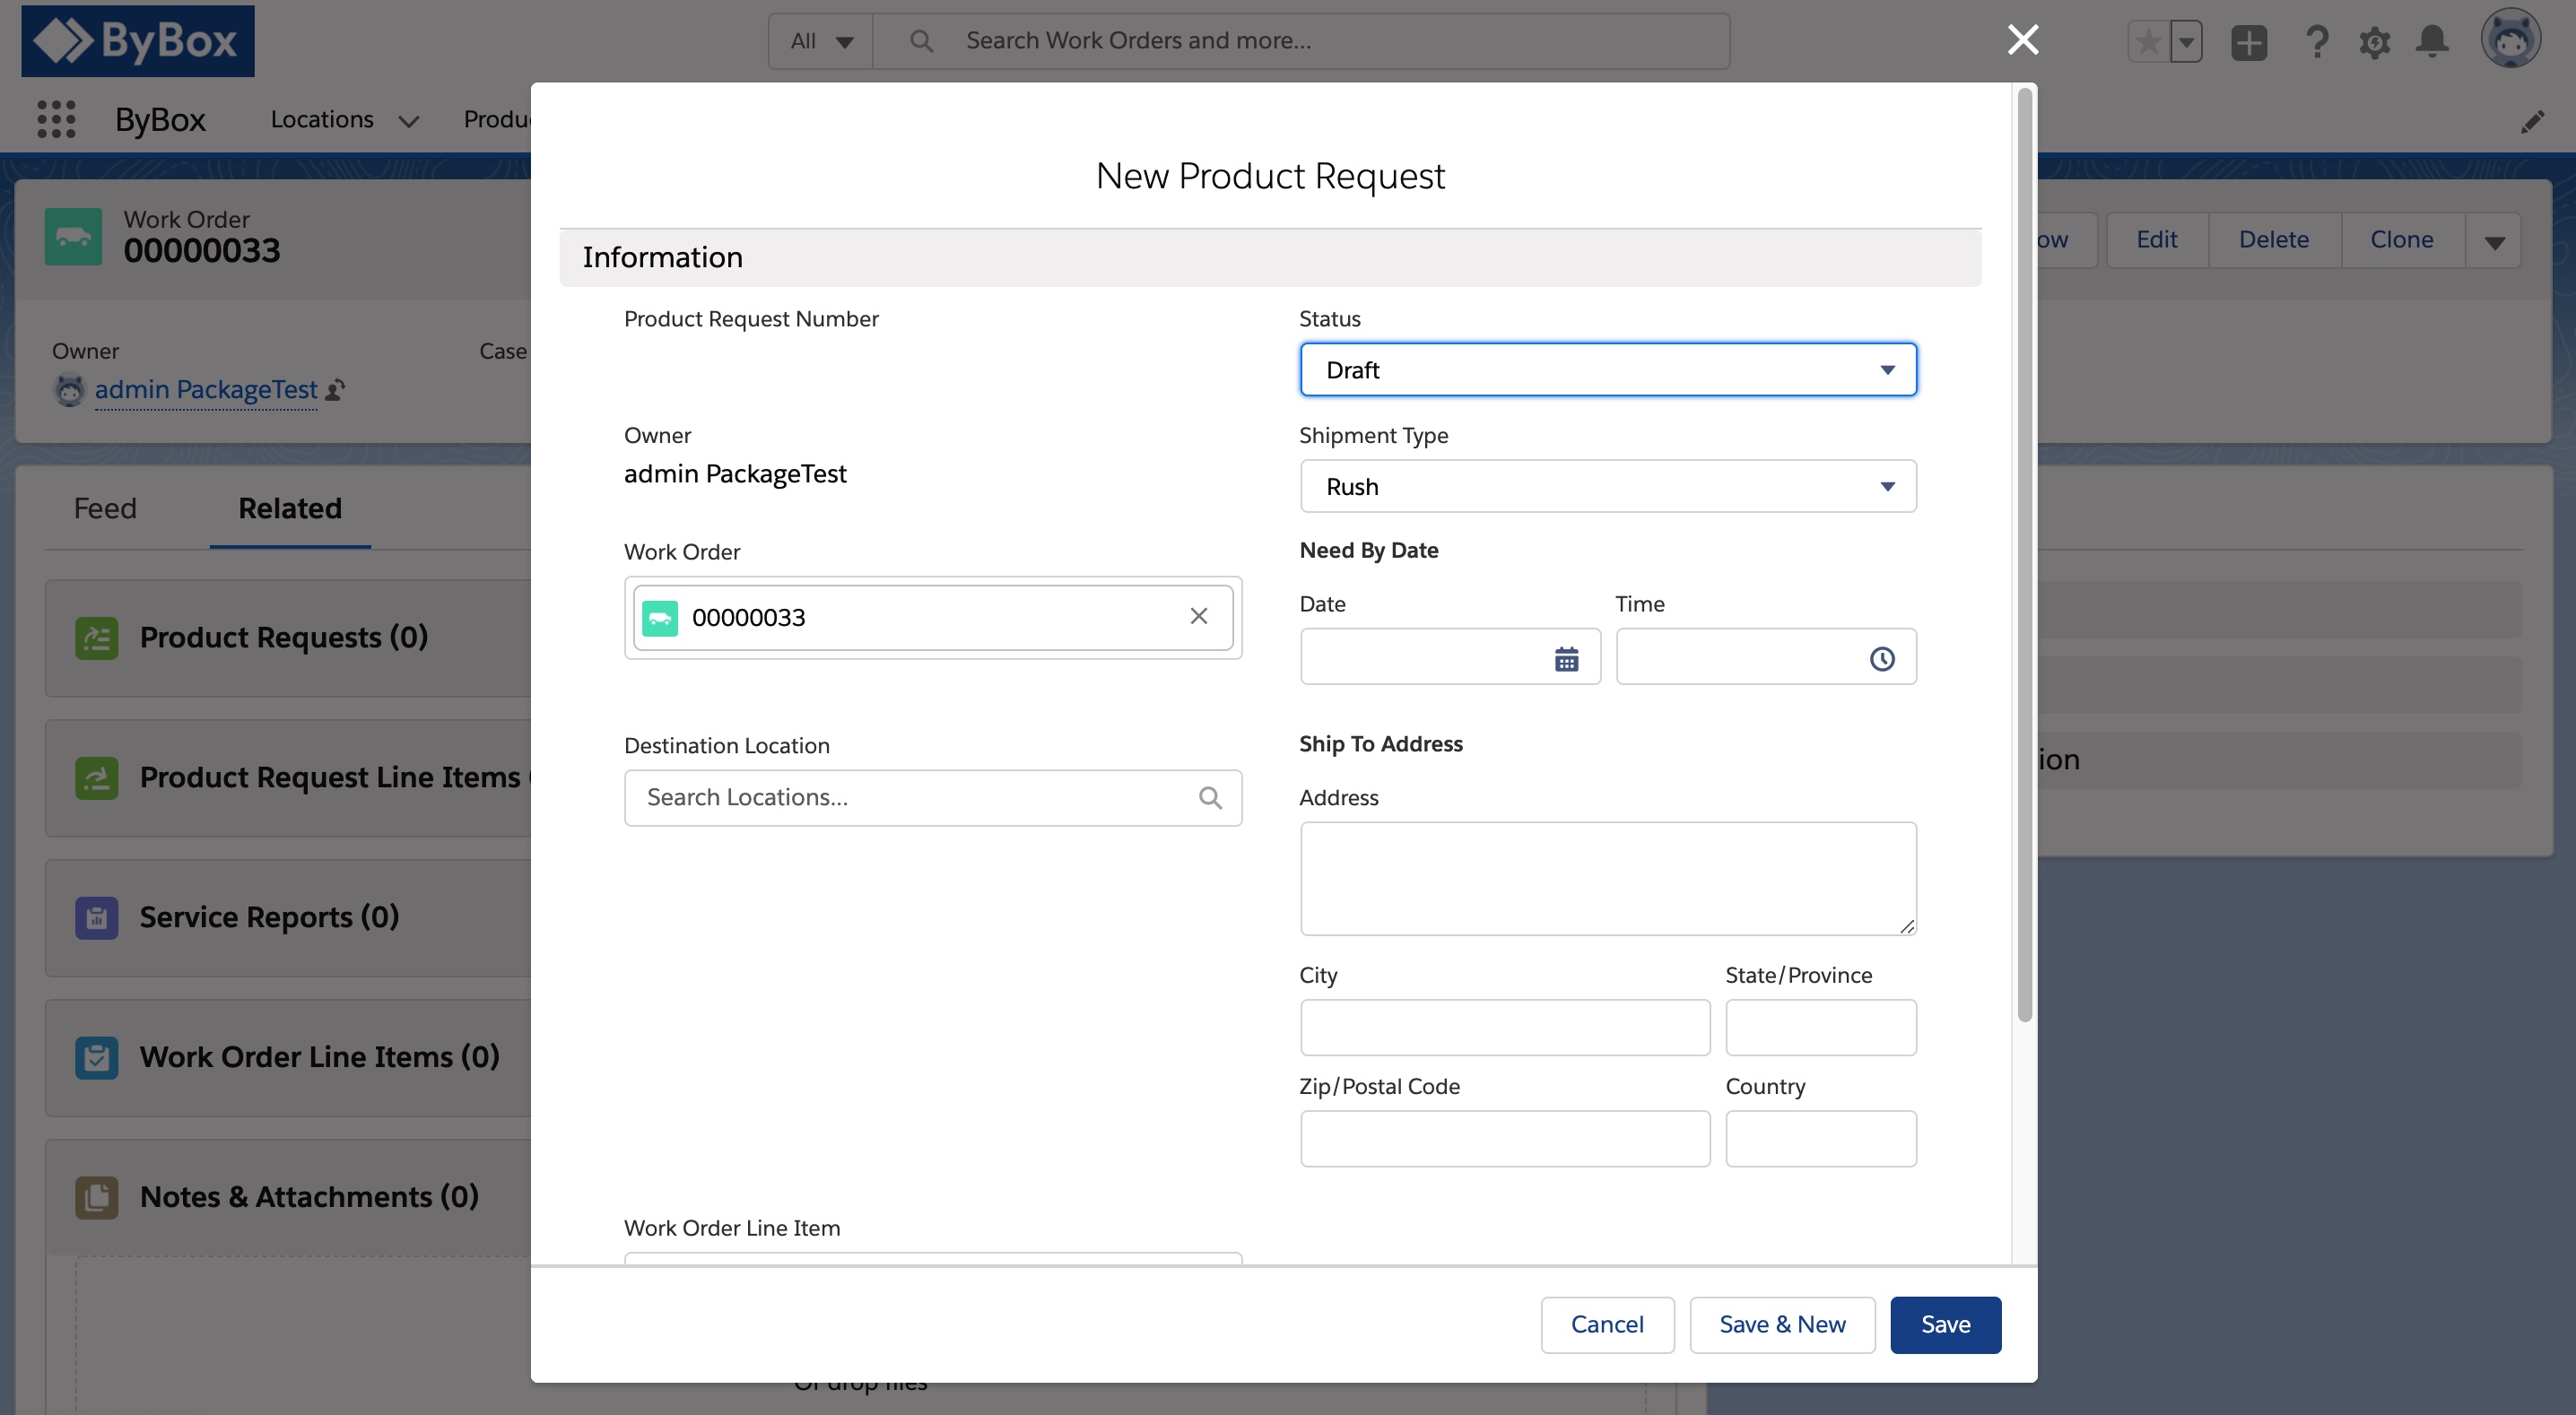
Create a new Product Request for the newly created Work Order.
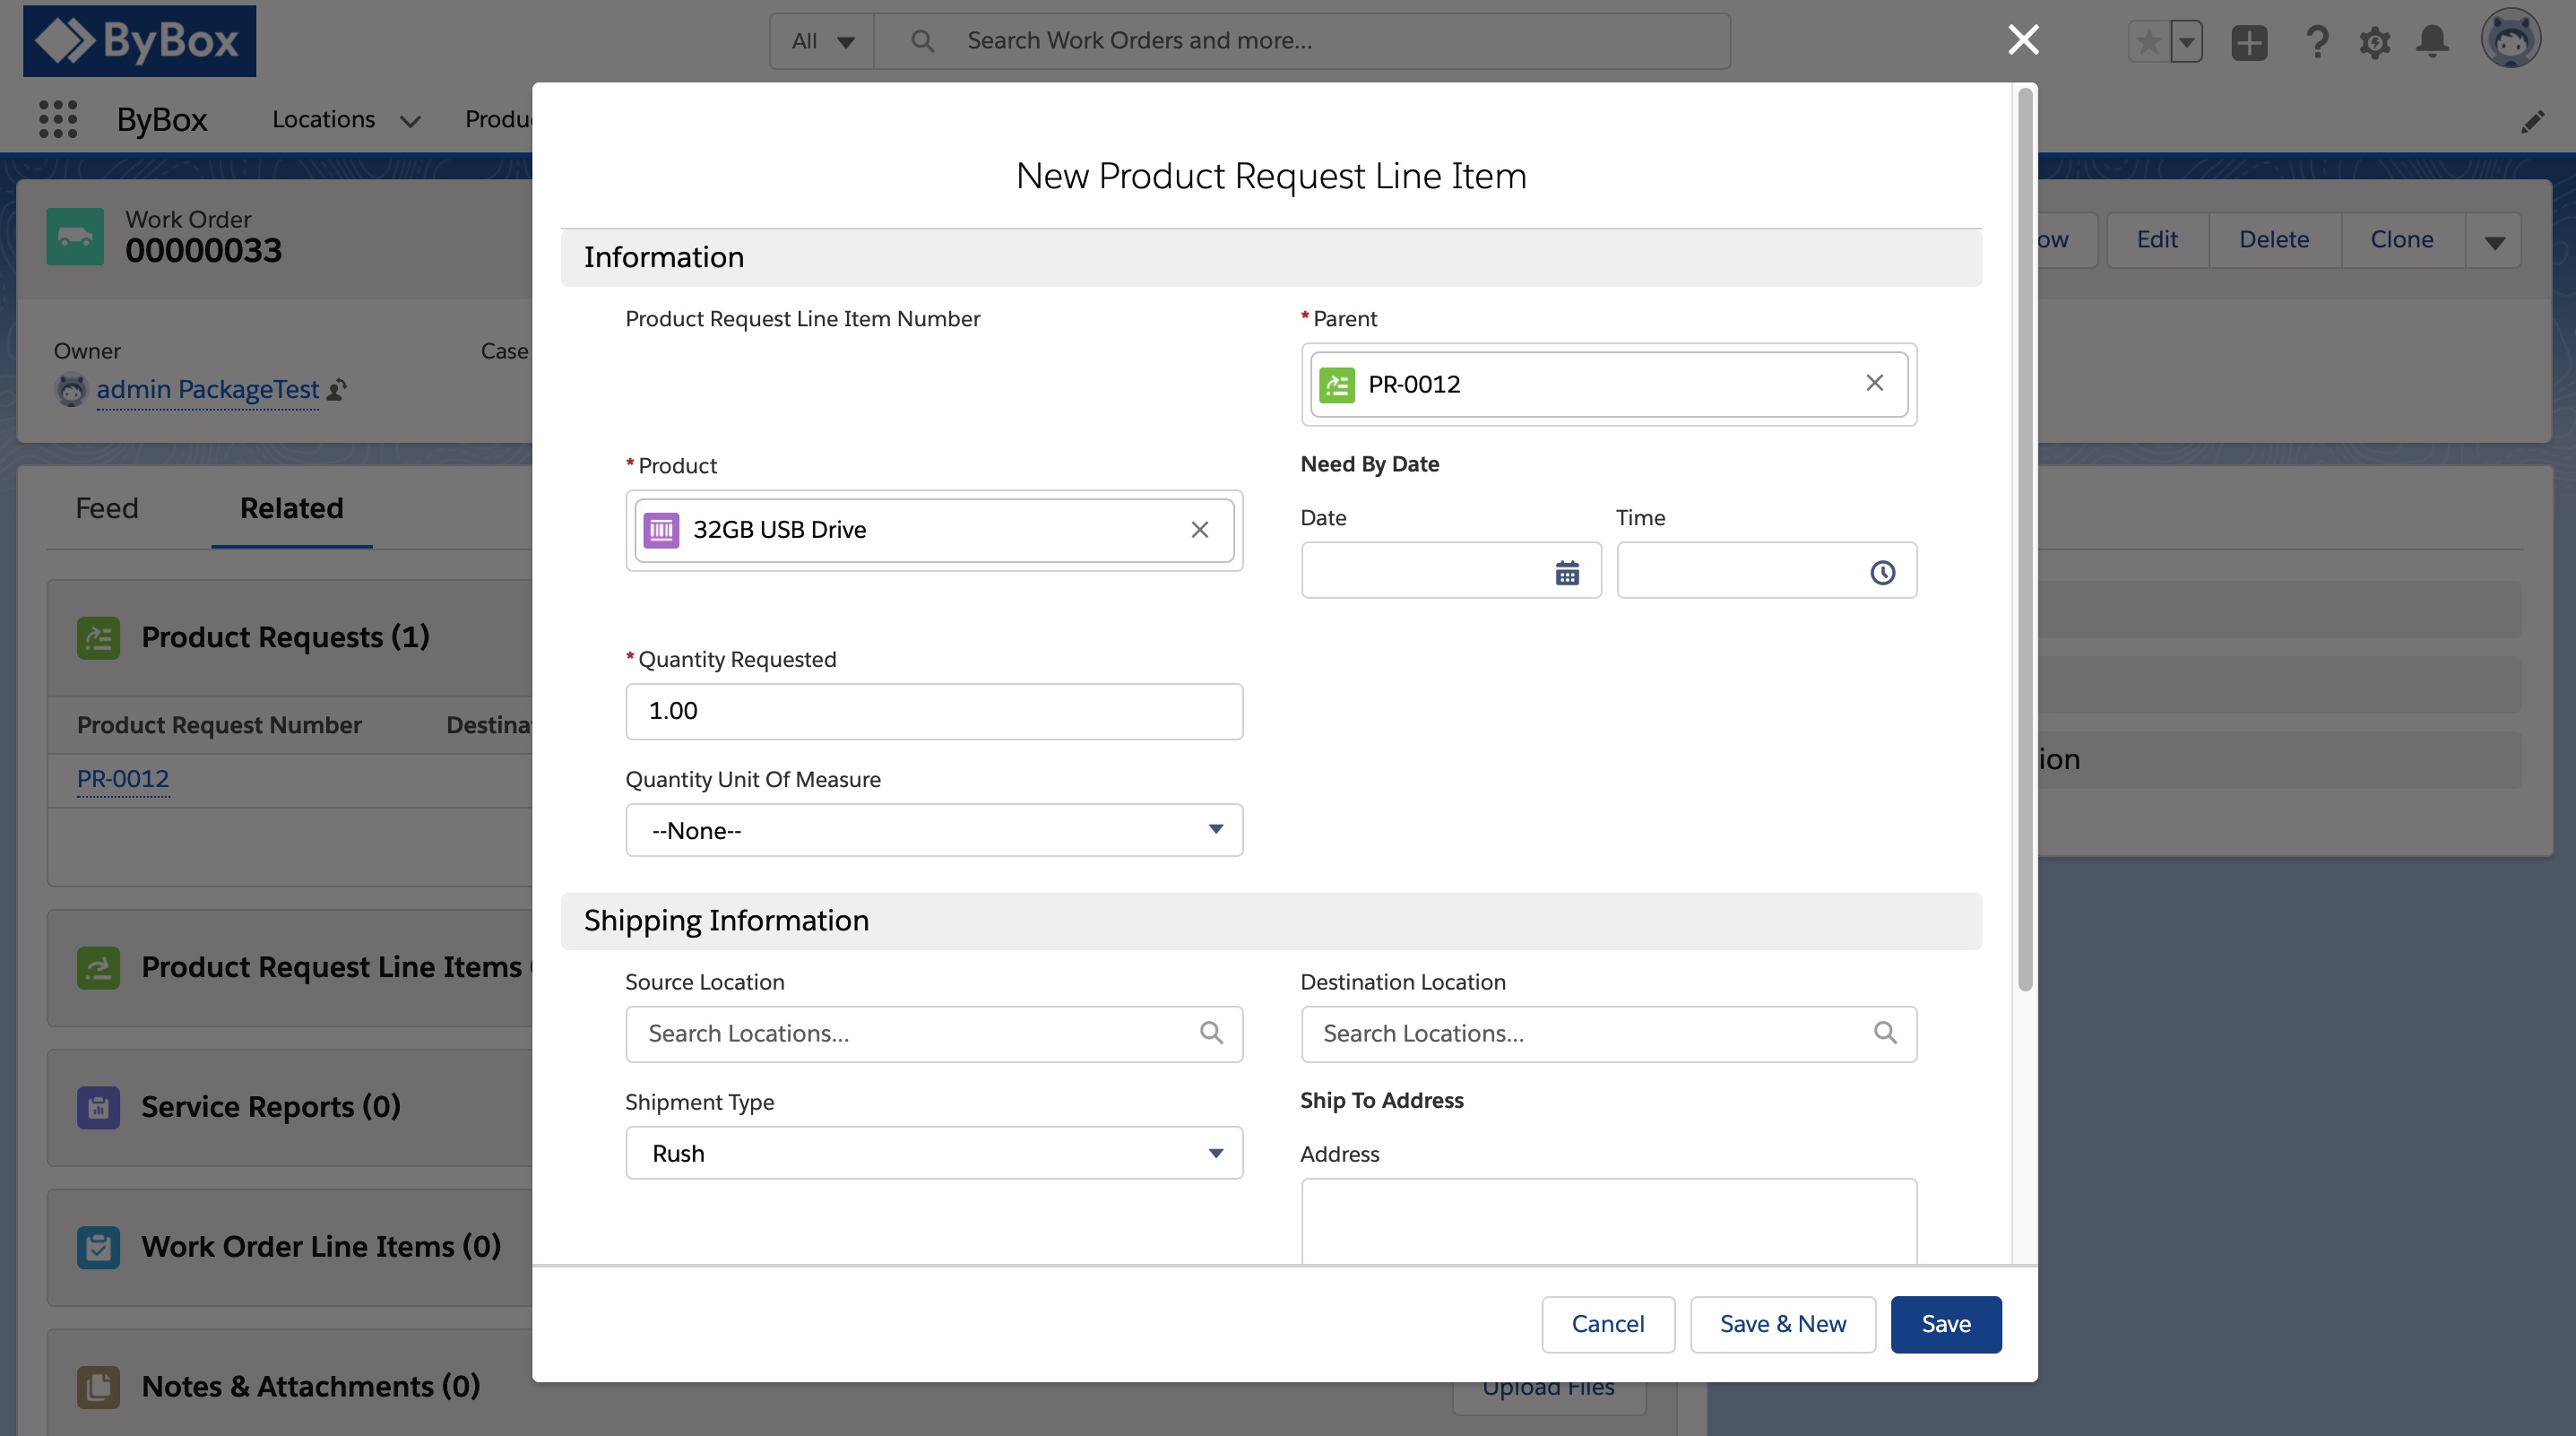
Create a new Product Request Line Item for the newly created Work Order.
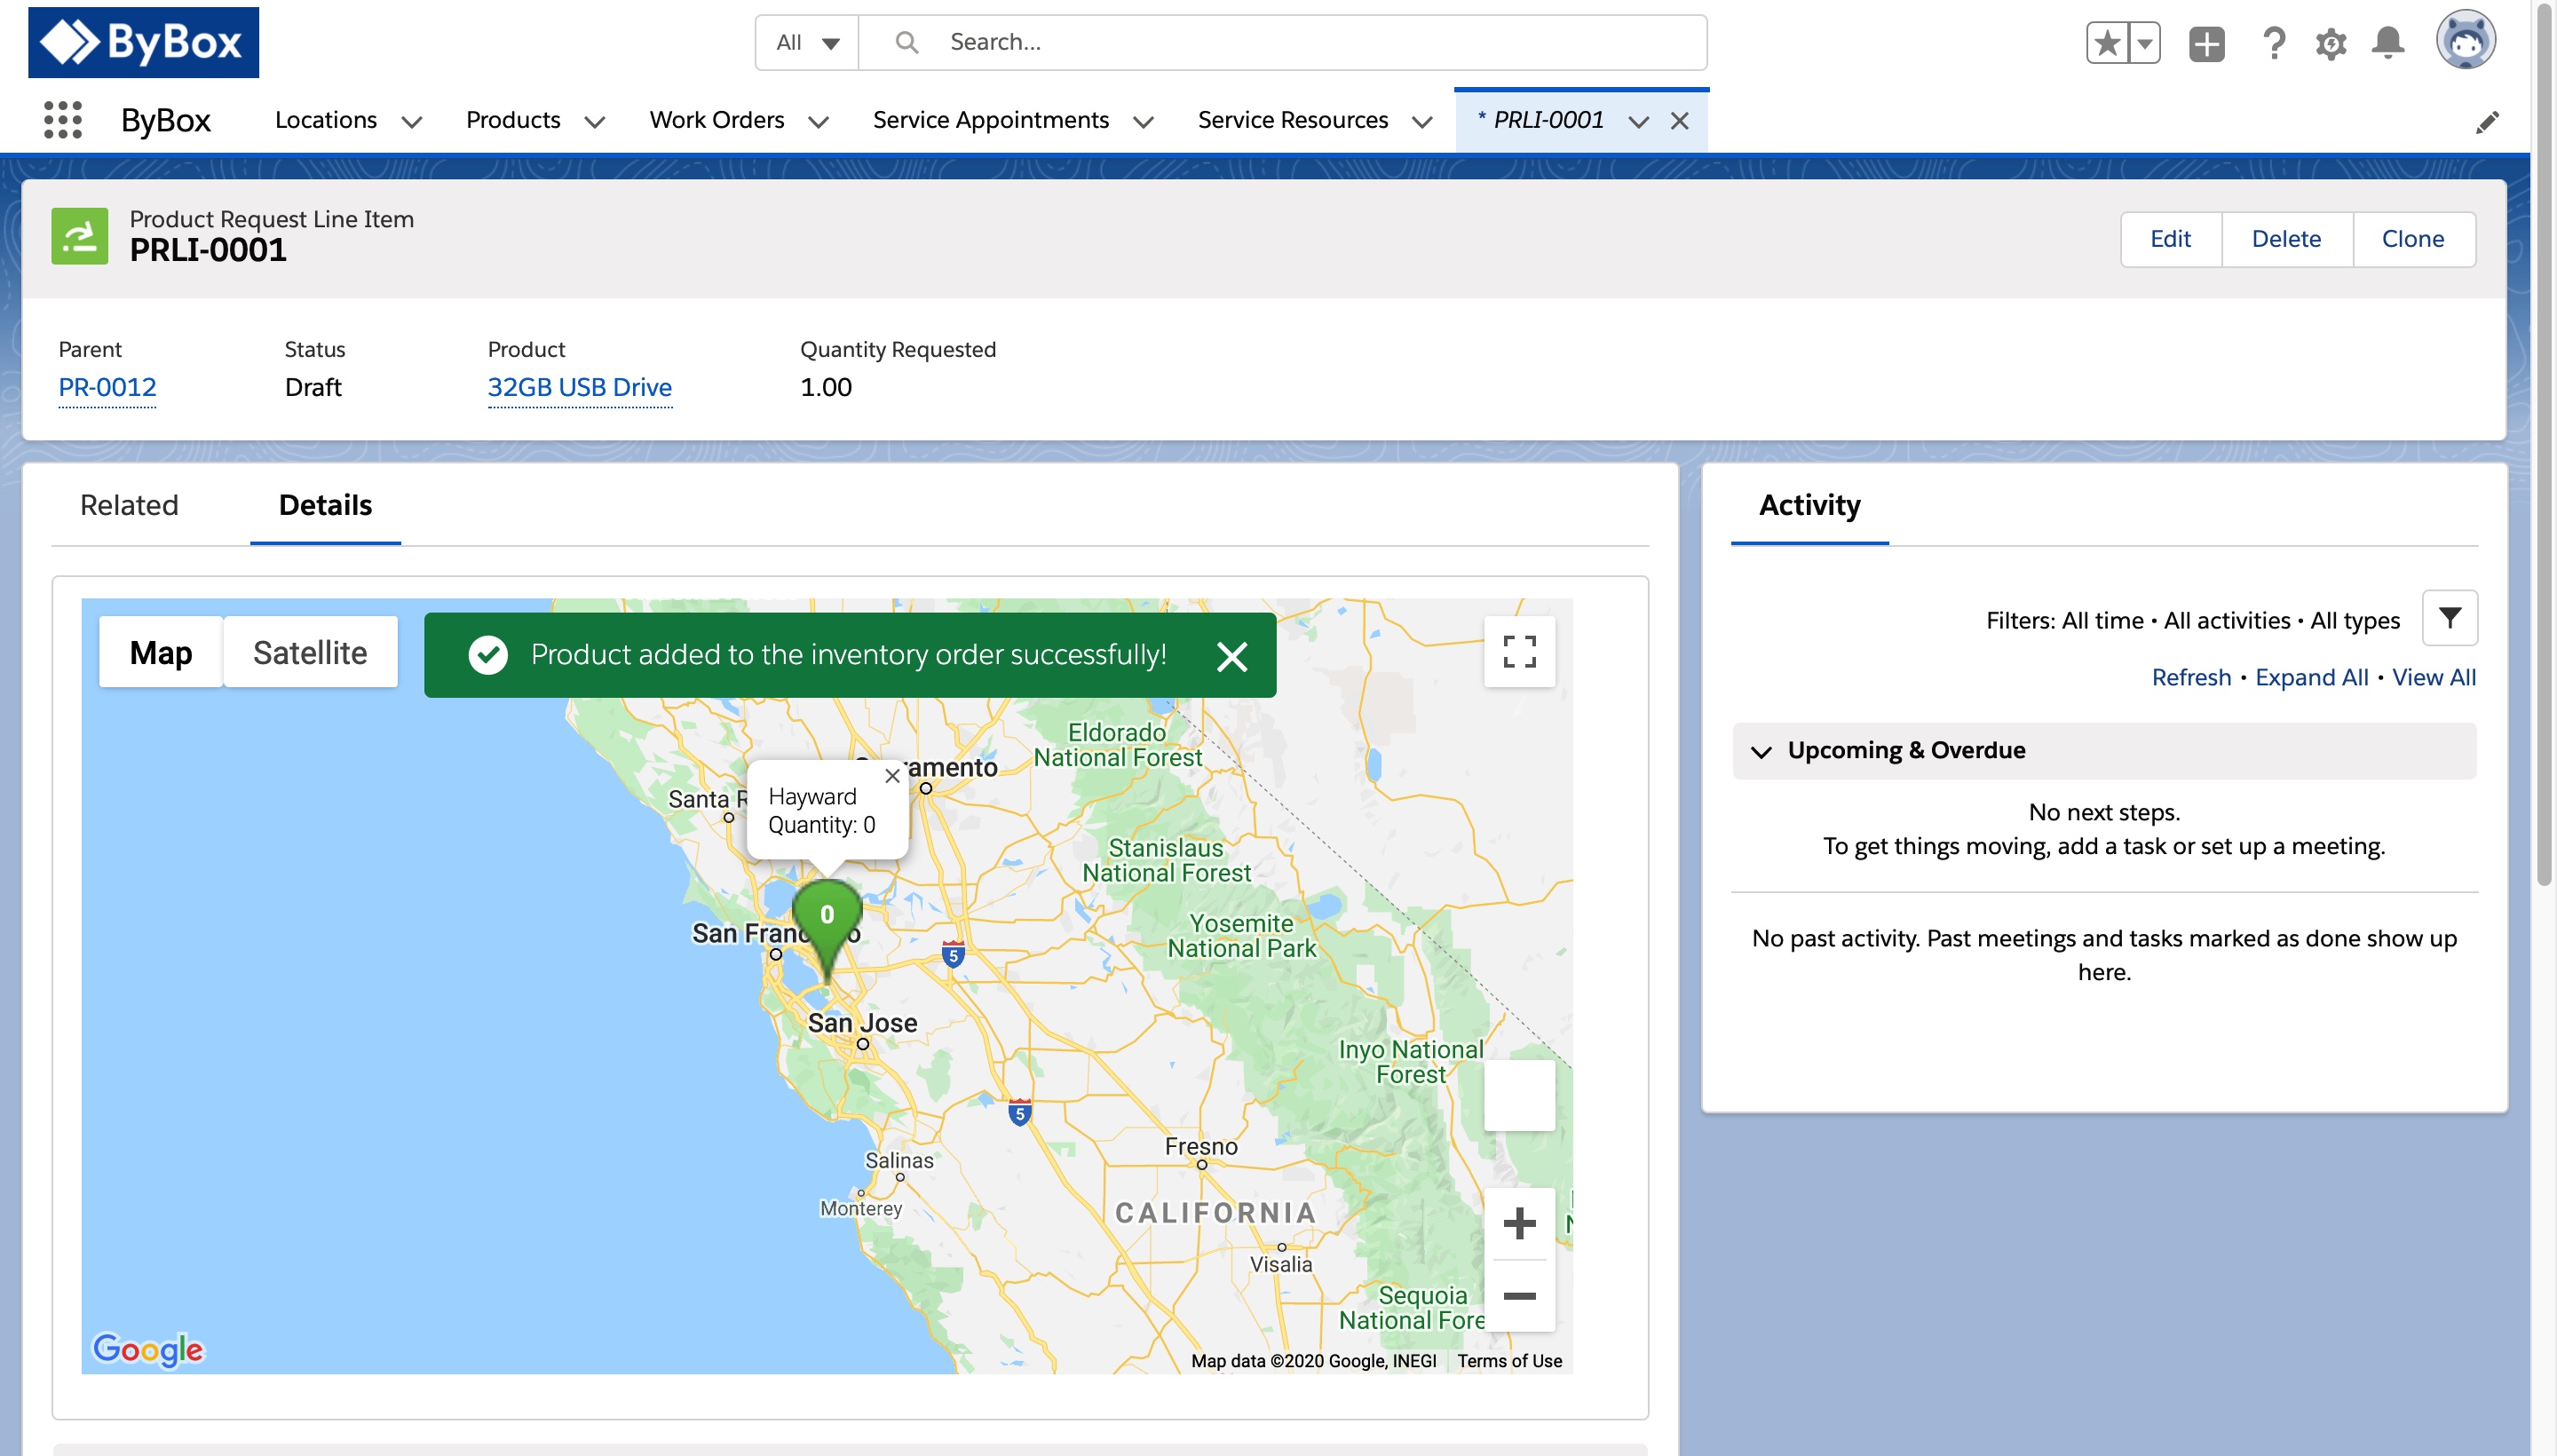
Go to the newly created Product Request Line Item and then click on the required location in the map to add product for an inventory order.
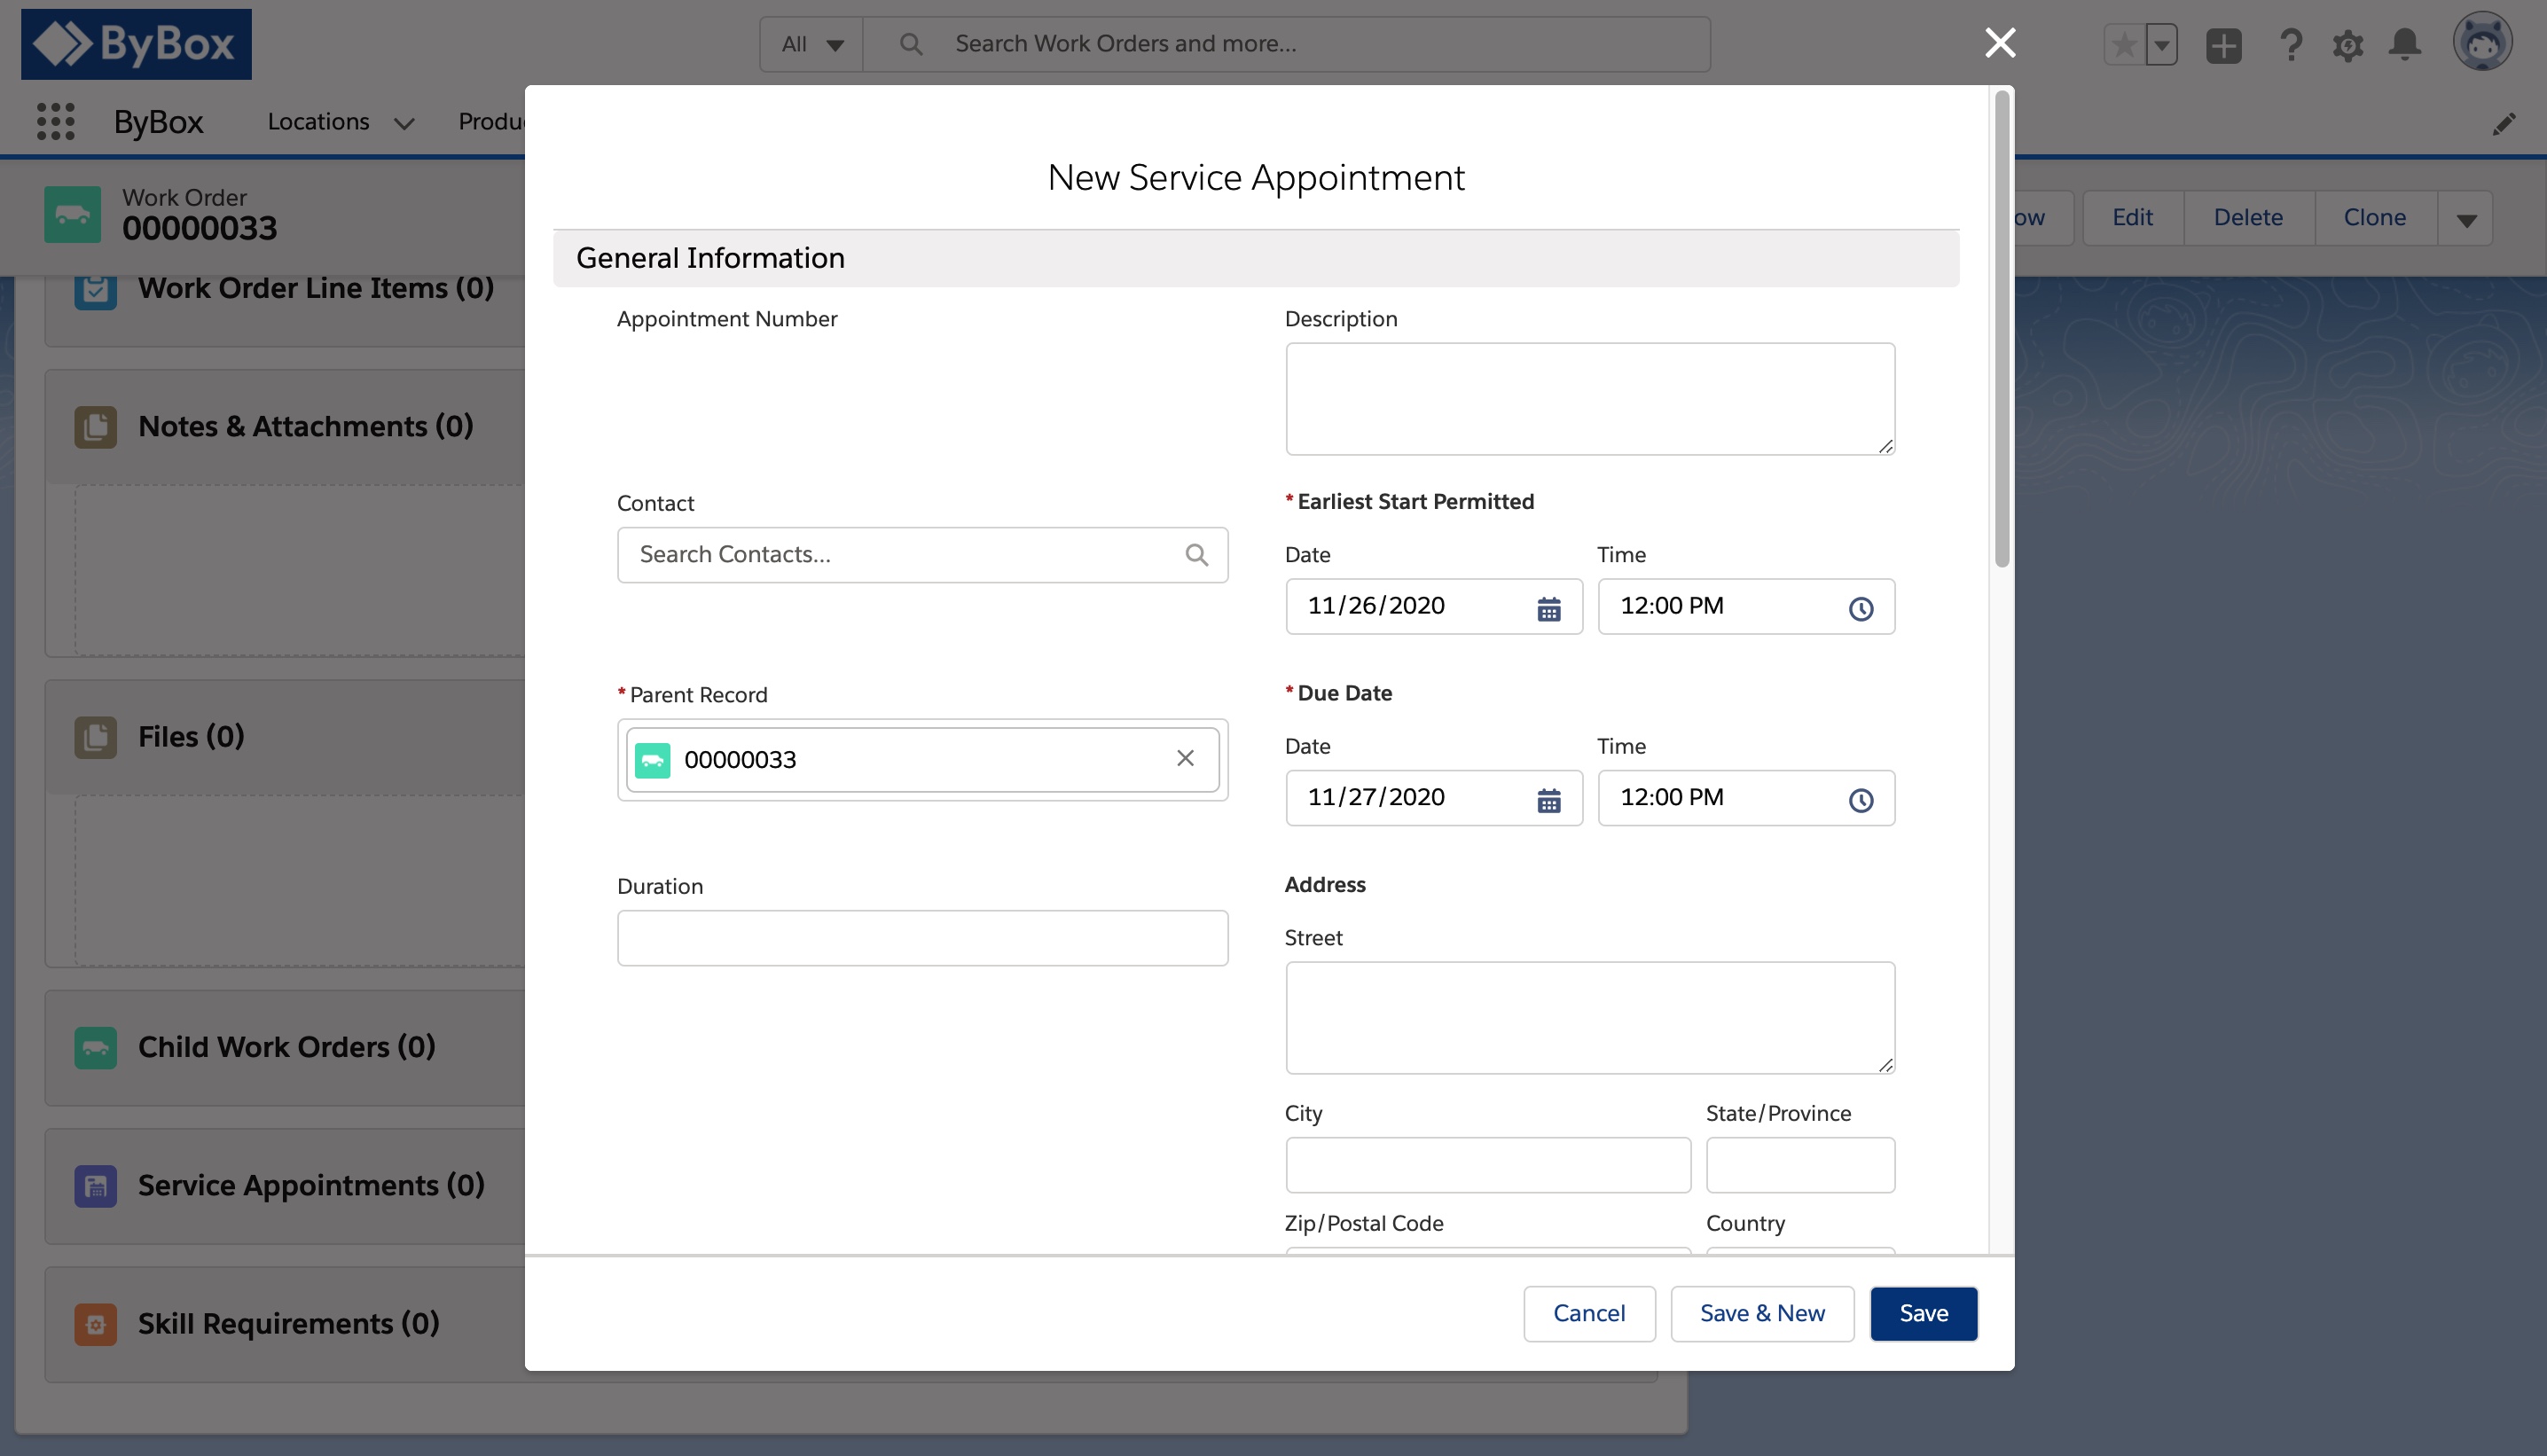
Go to the newly created Work Order and create a new Service Appointment by entering data for the necessary fields.
Go to SetUp > Users. If required, create a new User by providing all the required information and enable the ByBox checkbox to sync with ByBox application.
Go to Service Resources Tab. Create a new Service Resource if required.
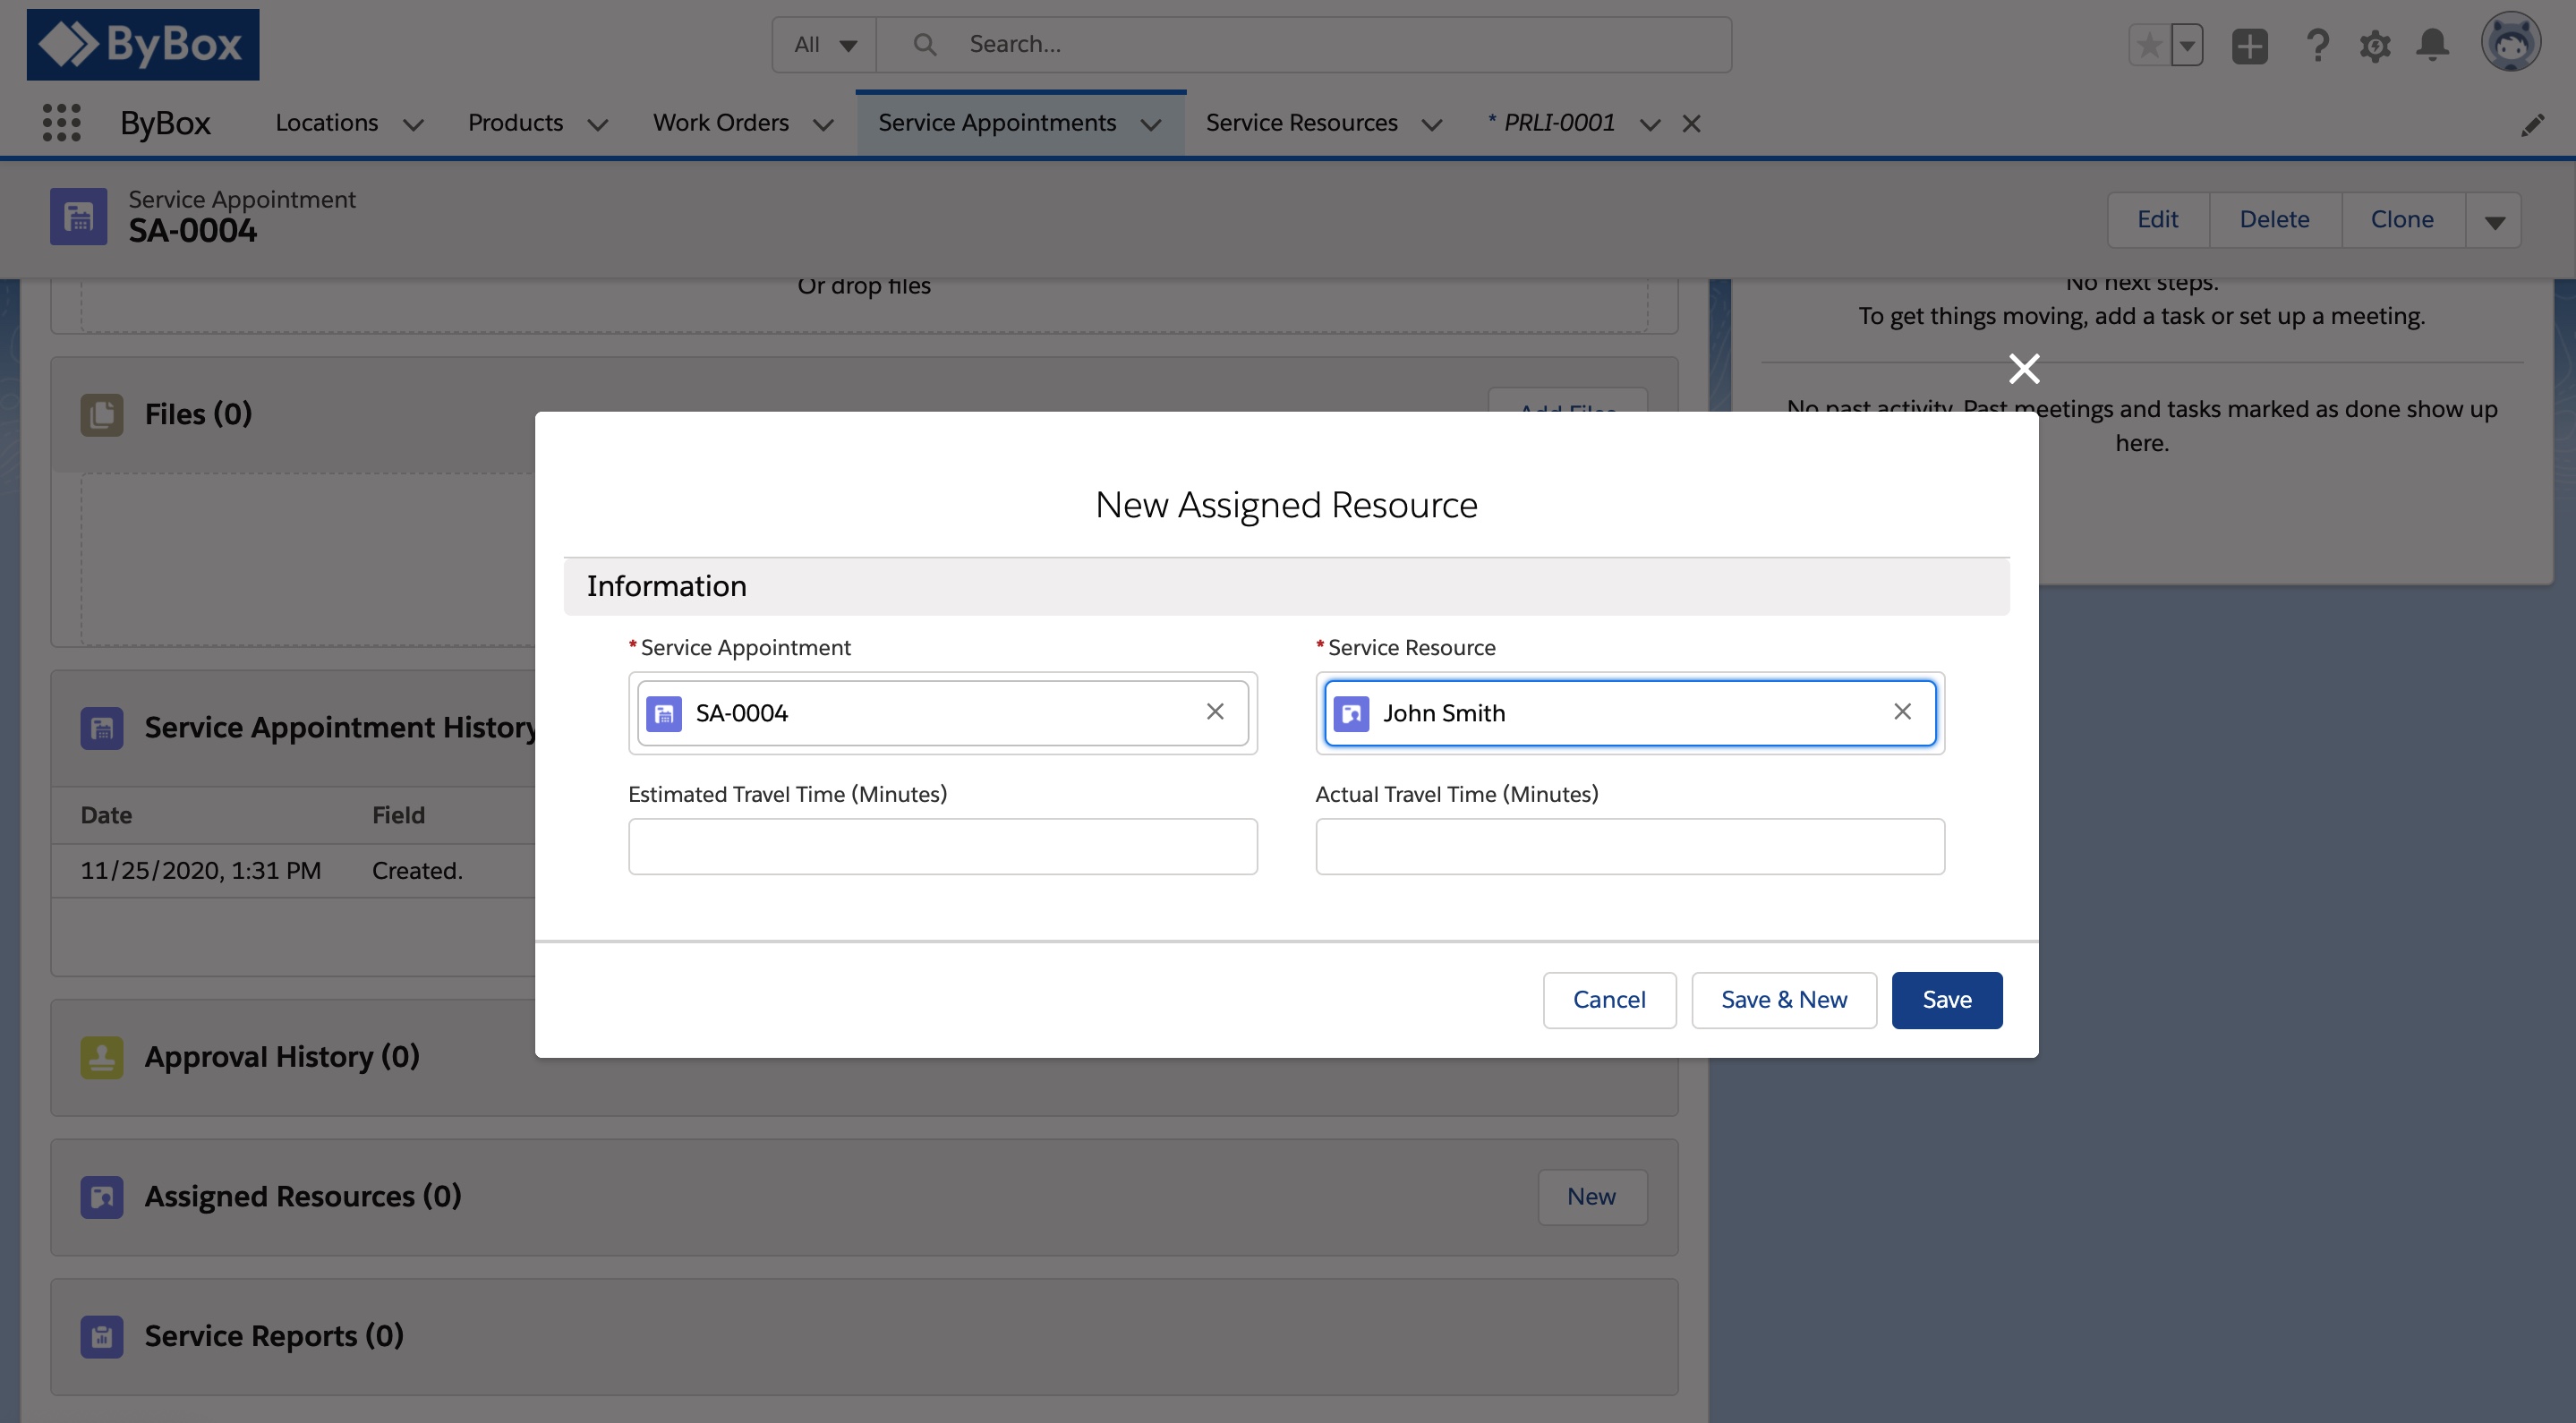
Go to the newly created Service Appointment and create a new Assigned Resource. Search for the Service Resource and save the details.